

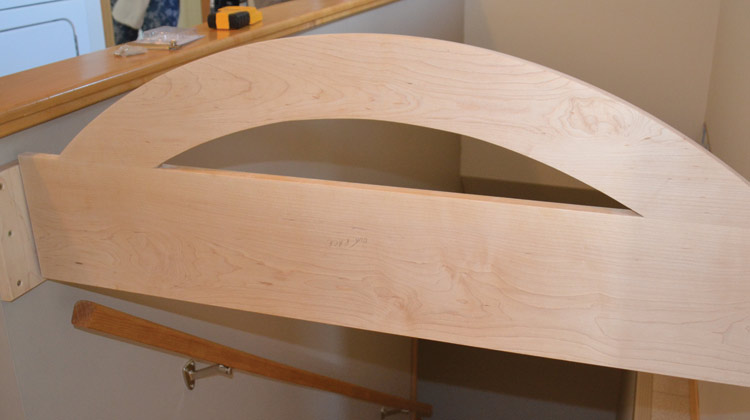
I was recently hired by a couple to build an indoor gate with an “eyebrow” ellipse to enhance the top of the structure. As the gate was designed to prevent elderly visitors from potentially stumbling and falling down a long set of basement stairs near to the home’s entrance, the structure’s entire height was only 17”, ellipse included. The width was 43” or the distance between the walls either side of the stair well.
The completed structure of solid maple consisted of a 7” wide bottom chord with an ellipse attached to the top edge. To allow for hardware, the ellipse was 3” shorter on each side of the 43” bottom chord or 37”
To create the ellipse, I ripped a 3/8” scrap of sheeting plywood into a 43” long x 10” wide template. I marked the center (21.5”) at the bottom of the sheet and used a carpenter’s square to draw a diagonal line upward 10” from the centre point, where I tacked a finishing nail into the plywood, leaving most of the nail protruding upward. This point marked the height of the ellipse.
Next, I measured 18 1/2” either side of the bottom center point to locate the foci that would establish the ellipses overall length of 37”. I lightly drove a finishing nail into each of these points.
I then tied a loop of non-stretchable string tightly around all three nails. (For an accurate result, it is critical to use non-stretch string. I suggest 30-pound Spider Wire, a tough fishing line.) I cut a notch with a knife in the wood just above the lead of a sturdy pencil, and then I slipped the line into the groove. Removing the top nail, I aligned the pencil’s point with the nail hole, ensuring the string was tight and the pencil perpendicular to the ply template. Sliding the pencil slowly to the left and then to the right, I drew an ellipse onto the plywood template.
I cut out the template with a band saw, then cut it in half, flipping the left side on top of the right to ensure both sides of the template were the same, which they were. (If one side is slightly larger or smaller than the other, use the most symmetrical side to trace your ellipse onto a board by using the half-template to draw both sides.
I band sawed the traced ellipse from a maple board and smoothed the kerf marks with a belt sander.
Finally, I used a homemade wood compass with a small roller bearing attached to one leg and a pencil to the other to copy the ellipse’s upper convex curve to create a 4” wide elliptical board. I attached either end of the “eyelash” elliptical board to the bottom chord with yellow glue and dowels.
Another method I use to draw ellipses is a variation of the string technique, requiring three similar reference points. Instead of twine, I firmly screw together the overlapping ends of two ¼” thick scrap sticks, centering them over the top point of the ellipse, marked by a protruding finishing nail. I then extend one leg of this compass-like device to the left side focal point, resting its inside edge against the second finishing nail. Finally, I adjust the other leg parallel to the template’s bottom edge, which is the height of the ellipse.
Holding a pencil level to the template board and tightly to the leg’s lower edge, I move the apparatus to the left, ensuring both legs remain in contact with the nails. Then, I repeat the process on the opposite side by sliding the right leg downward to contact the nail that marks the second focal point. (The opposite leg does not need to be readjusted.)
In my opinion, both these techniques will yield accurate results, though I find the string method takes longer to set up and for drawing large ellipses can be less precise because of pencil wobble, in my case, at least.