

In my last two columns, I warned readers about the dangers of hiring fly-by-night roofing companies. Money may be saved in the short term, but in the long haul you may be on the hook for an expensive repair bill.
The example I used in my columns was a cottage in the Whiteshell which had been reroofed by a “cash only” contractor, inexperienced with metal roofing. As a result, a slow leak developed around the chimney. Over the next ten years, rain and snow melt accumulated between the vapour barrier and an outside wall, creating a warm, moist environment for mold and related microorganisms to thrive. And thrive they did. When the Gyproc wall covering was removed, the cottage owners discovered that a 15-foot length of wall plate consisting of six layers of 2x4s had been reduced to a dry, paper-like material in some areas and to a damp, humus-like soil in others.
We (the cottage owners and I) removed the mould by hand, protecting ourselves with latex gloves, goggles and masks. We allowed the infected wall cavity to dry out completely for five days, then disinfected the area with a 3% solution of hydrogen peroxide, sprayed from a bottle. (A mixture of one-part household bleach to ten-parts water will kill mould on surfaces, but, because chlorine cannot penetrate wood, it is not as effective as hydrogen peroxide which will penetrate to the fungi’s roots, killing it permanently.) We allowed another two days for the peroxide to dry out completely.
While waiting, we replaced the leaking collar with a part recommended by the chimney’s manufacturer. After 24-hours, we soaked the metal collar around the chimney many times with a hose to ensure it did not leak.
When we were confident the collar was water- tight, I replaced the original wall plate with three manageable sections, each consisting of six layers of 2x4 by five-feet long, laminated together with PL Premium Construction Adhesive and lag bolts.
It required two men to heft each new plate into position and a scissor jack to centre and level it on top of the new studs. Three-part by 2x4 studs were used to support the beams at the joins where they met to ensure they were firmly seated, not hanging from the edge of a stud.
I replaced the mouldy fiberglass insulation between the wall studs with 2-inch Owens Corning CodeBord, with an R-value of 10. I sealed the edges where the rigid board met studs and plates with low expansion spray foam. I then used PL 300 adhesive to glue a second sheet of 1-inch thick CodeBord over the first to achieve a total R-value of 15. The CodeBord is about three times the cost of fibreglass batts, but it does not wick up moisture like fibreglass, and therefore it is less likely to become a flourishing environment for mould growth.
I elected to install a 6-mil vapour barrier over the CodeBord and 2x4 wall, rather than sealing all the joints with red tape and spray foam. The former method guaranteed a perfect air seal, the latter, not so much.
As the drywall in the old cottage was 3/8-inch thick, I paid a premium of $5 per sheet— $20 for 3/8- inch compared to $15 for ½-inch. Unless you are removing all the drywall, there is no option in a case like this.
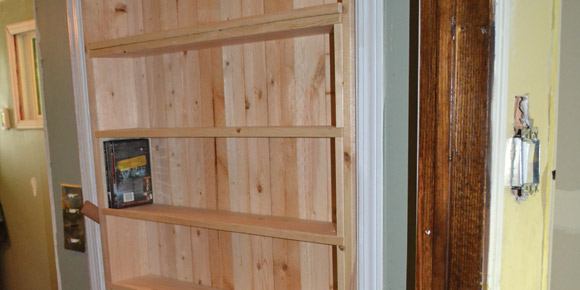
When the new drywall was in place, the cottage owners decided to create a multi-purpose, three-sided storage closet out of an existing cupboard, gutted when mould was removed from it. Their plan included a built-in CD storage case with adjustable shelves, an eight-shelf storage closet with two upper and two lower doors to access stored sheets and blankets and a clothes closet with a wood dowel on which to hang outdoor jackets, as well as shelves for footwear, T-shirts, sweaters and much more.
I built the sides, tops and shelves of the CD case from 1x6 pine; the back consisted of 1x4x7/16 T&G pine, purchased in packages of 14 square feet for about $14.
Because the opening into which the CD case had to fit was not square, I built the case first, leaving a one-inch gap all around the case and opening. This gap allowed me to square the case in the opening with cedar shims, just like a finished window is fitted into a rough wall opening. I had to make some wide 1x5 moulding to cover the gap between the CD case and the rough opening, which had originally housed a sliding door.
I used the same pine mentioned above to build four small doors and one large door to enclose the ¾-inch birch shelving inside the hallway and bedroom sides of the multi-purpose cupboard, respectively.
Finally, I covered the edges of the birch shelving with ¼” thick by ¾” wide strips of birch ripped on the table saw from a solid board. I used yellow glue and brad nails to attach the strips, countersinking the nail heads and filling them with plastic wood. (I never use iron-on veneer banding because the veneer peels off the plywood edge about a month after it has been applied.)
davidsquare81@yahoo.com