

Say goodbye to gardeners’ back pain and noxious creeping weeds by constructing a raised garden for a balcony, deck or lawn.
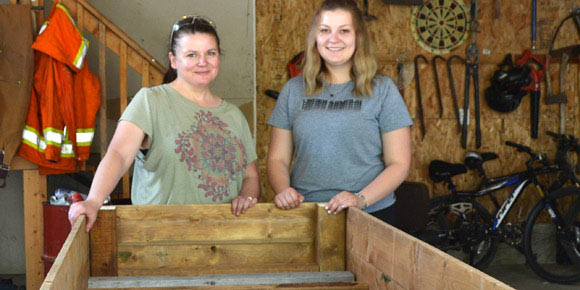
DIYers Danielle Erickson and daughter Kim built two prototypes in a day of the raised bed discussed in this article. When photos of the completed garden boxes hit the internet, the talented duo immediately received requests from friends and family for their own planters.
“We’ve cut production time to two hours per bed and soon will have ten built,” says Danielle, who is uncertain whether to laugh or cry at their success as she has a full time job and Kim, who graduated recently with a B.Ed. from the University of Winnipeg, plans to be teaching in the fall.
The Ericksons’ raised beds are 3’ feet high—a comfortable working height—by 3’ wide and 6’ long; however, all the dimensions can be altered to accommodate almost any size space.
I will use Danielle and Kim’s planter measurements to explain how to construct your own raised garden.
Materials:
1 pc. 4”x4”x12’ cedar
1 pc. 2”x4”x8’ cedar
10 pcs. 1”x6”x6’ cedar fence boards
Landscape fabric and cage wire
100 pcs. 2½”x #8 or #10 coated or stainless deck screws
Tools:
Saw, hand or power
Screw driver or power drill with #2 Robertson bit
Tape measure, stapler, carpenter’s square, plane
To begin, cut your 4”x4” post into four 3’ lengths for the legs. The posts may be slightly less than 3’ due to the width of the saw blade’s kerf, but this is nothing to fret about.
Next, select two 1”x6”x6’ cedar boards and cut them into four 3’ pieces to form the planter’s short ends or aprons. Also, pick four straight pieces of 1”x6”x6’ to build your box’s long sides or aprons. (Fence boards are generally pre-cut to exactly 6’ by the manufacturer. If not, trim them to a consistent length of, say, 5’11”.)
Begin assembly by flushing one end of a 3’ board to the top and side edge of a 4”x4” post. Secure the board with a single 2½” screw, ensuring the board is at a right angle to the post with your square; then drive in two more screws, staggering them to prevent cracking. Attach another post to the opposite end of the board, using the same technique. Position a second 3’ board below the first, checking that the joint between boards is reasonably tight. If not, flip the bottom board or plane its edge until there is no significant gap between pieces. Secure the bottom board with screws to complete one end of the planter; repeat the procedure to make the second end.
The sides are constructed of 6’ boards in a similar manner to that outlined above, with the exception of a ¾” overlap at either end to cover the end grain of the short aprons.
When the legs and apron boards are all firmly attached, rip your cedar 2”x4”x8’ in half to yield two 1½”x 1¾” x 8’ cleats. Measure the inside distance between all posts and cut four cleats to these lengths. (The two end cleats may be slightly short, but this will not weaken the structure.) Screw the cleats to the inside bottom edges of the planter’s sides and ends. The screw heads will show on the outside of the planter, but this is the strongest way to join the cleats to the aprons. (All visible heads can be countersunk and hidden with a cedar tone filler, if desired.)
Measure the distance between the sides of your planter box and cut 8 pcs of 1”x6”x6’approximately 34” cedar to span the distance. Place these support boards approximately 8½” on centre and screw them into the cleats from above. The two end boards will require notches to fit around the leg posts which are positioned at the inside corners of the planter. Make the notches about ½” larger than the posts to allow for drainage.
Snip out a piece of cage wire slightly bigger than the inside dimensions of your box, bending the edges upward so the wire extends about 1” above the level of the support boards. Use ½” staples to fasten the wire to the inside faces of the aprons.
Finally, cut your landscape fabric big enough to cover the box’s bottom as well as reach upward about three-quarters of the height of the side and end aprons. Use a few staples to tack the fabric into place before filling the planter with soil.
For optimum plant growth, gardening aficionados recommend a four-way topsoil comprised of 40% soil, 40% peat moss, 10% sand and 10% steamed compost. Most garden centres will deliver several yards of the mixture or sell a pick-up load to a customer for $30 to $60, depending on the load’s size. The raised garden in this article requires ¼ yard of mixed soil to fill to a depth of about 11”.
For a list of plants to grow in a raised bed, go to www.craftsy.com/gardening
davidsquare81@yahoo.com