

Knowing how to build stairs and how to drywall are two essential requisites for DIYers who intend to upgrade an older home.
I make the above statement in the belief that DIYers who master the craft of stair construction and the skill of gyprocking can also undertake most of the other work involved in a home renovation.
6-riser, 5-tread stairway
So let’s get your hands dirty by describing how to build a 6-riser, 5-tread stairway out of 2”x 12” spruce.
Before you construct your pattern stringer, a few measurements and calculations are needed.
The first dimension required is the total rise from the base of a staircase to the top of the floor or landing above. The second is the total run or distance from the base of the staircase to the outside edge of the first step or tread, determined by the number of treads. The third is the width of the staircase. Let’s assume your steps will be 40" wide, more than enough to satisfy the 36" minimum code for indoor residential stairways.
Code also states that unit rise (as opposed to total rise) is 7” to 7¾” per tread and unit run is 10” per tread. However, a maximum rise of 8” is permissible in some areas, as is a run of 9”, so check your local code ahead of time. While you are at it, look up the head space requirement for a staircase; a minimum 6’ 6” to 6' 8" measured plumb from the nose of a tread is usually mandatory.
To keep the math simple, let’s assume your total rise is 42”. To determine the number of unit risers, divide 42” by 7” = 6 risers. (Your total run will then be 6 risers x 10” unit run = 60”.)
Using a steel square, mark the rise and run units on a 2” x 12” by placing the square along the face of the board so the 7” and 10” measurements align with the board’s outside edge. Use a soft lead pencil to mark both sides of the square; then slide it along the face of the 2” by 12” and realign the tool. A scrap piece of wood clamped at the 7” and 10” marks allows you to quickly and accurately reset your square.
Continue until you have created six risers. Cut them out with a builder’s saw. The board will need to be flipped to allow the underside kerfs to be completed with a handsaw.
Your finished stringer should resemble a giant handsaw blade with large teeth. Before you make the final top and bottom cuts, hold the stringer in position and measure and mark the lines for the cuts. Renovations can be tricky because floors and walls may not be level or plumb.
Write “pattern” on your completed stringer and use it to trace out subsequent ones. For a 40” wide stairway, two outside stringers and a centre stringer placed at 20” OC are needed. (As a rule of thumb, builders will put stringers at 16” OC or 24” OC, depending on the total rise and run of the staircase. You can’t go wrong with 16” OC, but in this case it is overkill.)
Place the appropriately spaced stringers against the wall and plumb and level them. Use screws to temporarily attach them to the wall; then screw the top tread into position. To ensure the base stringers are the same distance apart as the top ones, screw the bottom tread into place next. Continue to add treads. There will be one tread less than the number of risers or, in this example, 5 treads to 6 risers.
Stairs with a total rise over 30” require a hand rail, as well as balusters spaced 4” between each other. The standard height of a rail is 34” to 38” as measured from the top of the treads.
The stairway in this article (see photo) has a total rise of about 29”. In theory, it does not require a railing, but the homeowner requested one to ensure the safety of elderly parents who visit often. The top rail is 2” by 6” spruce and the bottom newel post is a combination of 2” by 4” and 2” by 6” spruce, secured to the stringer’s base with three carriage bolts, as well as 3½” deck screws toe nailed through the 2” by 4” that sits on the first tread.
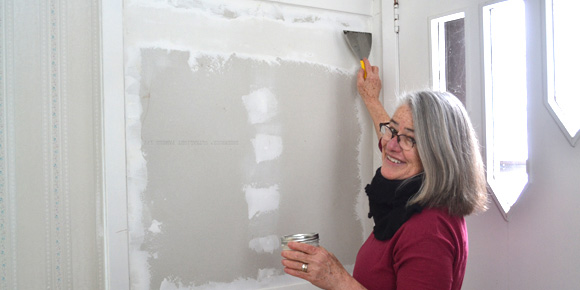
Drywalling
For the most part, drywalling is easy. Basically, it consists of attaching 4”x8”x1/2” sheets of paper covered gypsum board to framed walls with 1 1/4” drywall screws, using a corded or cordless drywall gun.
The fastest way to cut gyprock is to lay a sheet on a flat surface and score the finished side (paper is a lighter colour) with a box cutter guided by a drywall square that you can make or purchase at a building materials outlet.
Place the square onto the drywall’s surface and align it with measurements you have marked on the sheet with a pencil. Hold the square tightly and draw the cutter’s blade along the square’s edge to score the paper. Place the scored line over the edge of a table and snap the gyprock downward. The sheet should break evenly along the score. Next, slice away the paper backing with your knife; bumpy cuts can be flattened by running a rasp over them.
With your drywall gun set so that the screws will dimple the gyprock’s paper surface, drive screws every 12” to 16” into studs and every 8” at seams, offsetting the screws on either side of the join. Keep the screws ½” from edges to prevent breaking the gyprock.
You will notice that drywall has a slightly thinner edge on one 8’ side of each sheet. Pros usually install sheets horizontally with the thinner edges abutting each other at the mid-point of an 8’ wall. When the shallow formed by placing the sheets together in this manner is taped, filled with feathered mud, the seam is almost invisible to the eye. (A vertical application is less easy to mud and is more likely to be seen.)
I don’t have room to go into all the nuances of drywalling, but suffice to say a DIYer who has mastered the art will require little to no sanding between coats of mud. If sanding can be reduced to near zero, you are ready to tackle any job, especially as you are now knowledgeable about how to build stairs, too.
davidsquare81@yahoo.com