

Decorating eggs for Easter is a tradition that dates back to at least the 13th century, according to some sources. One explanation for this custom is that eggs were formerly a forbidden food during the Lenten season, so people would paint and decorate them to mark the end of the period of penance and fasting, then eat them on Easter as a celebration. The egg was also an ancient symbol of new life, and has been associated with pagan festivals celebrating spring. It is still used in many types of ceremonies today.
Whichever way you celebrate Easter, colouring eggs is a popular activity for the holiday and is a fun activity that the whole family can participate in. Just remember to boil the eggs first if there’s a danger of little hands dropping the eggs! And use rubber gloves to prevent your fingers from getting dyed, too.
Here are five really easy and super-fun ideas to help you get started.
1. Sticker eggs This is probably the easiest technique of all. Buy a bunch of stickers in different shapes or letters and stick them onto the eggs. Or you can use shelf-paper or even masking tape and cut the shapes out yourself. Dip the eggs into dye, and once they’re dry, peel off the stickers to reveal a cute white or muted-colour design.
2. Spray painting This is probably the second easiest technique. Just line the eggs up in their original carton and spray lightly over the exposed ends. For a more child-friendly version, use fingerpaint and a toothbrush. Mash the toothbrush into the paint, point the brush at the end of the egg and drag another brush or Q-tip across the bristles towards you. You can leave the opposite end white, or wait until the paint is dry, flip the egg over, and use the same method with a different colour on the opposite end to achieve a really pretty ombré effect. Or simply speckle the entire egg for a natural effect.
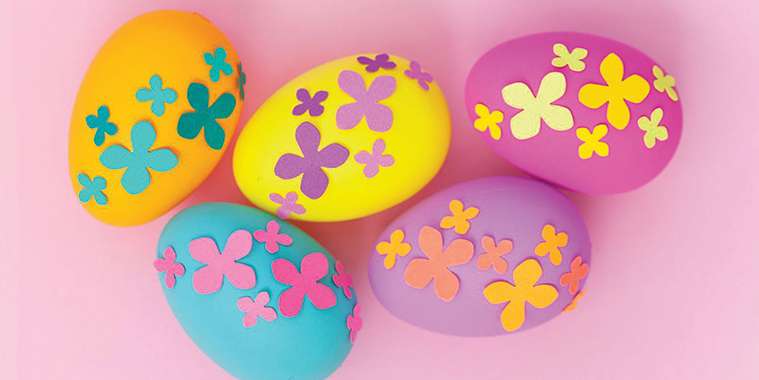
3. Paper flower or confetti eggs Super easy! Spruce up single-colour dyed eggs with glued-on paper flowers or confetti cut into random shapes from coloured papers. You can also easily buy ready-mixed packets of these types of decorations at the discount stores. Mixing bright colours will make them even more stunning!
4. Marbling This is a bit more complicated but the effect is gorgeous. Fill a baking sheet with shaving or whipped cream until it’s about an inch thick, then smooth it out. Drip food colouring onto the cream. The more colour you add, the brighter your eggs will be. Use a toothpick to swirl and marble your food colouring over the cream. While wearing rubber gloves, roll your egg in the cream, coating it completely. Carefully place the egg onto a paper towel without smudging it and let it dry. Wipe the remaining cream off with a clean paper towel to reveal your a lovely marbled pattern.
5. Natural dyes This technique is slightly more complicated by extremely eco-friendly and uses what you have, literally, lying around your kitchen. Combine 1 quart water and 2 tablespoons of white vinegar in a medium pot. Bring it to a boil, add your dye ingredients and lower the heat. Simmer for 30 minutes. Let cool. Strain the dye before adding the eggs. Let the eggs soak for at least 30 minutes. For a more vibrant egg, let it soak longer. When it reaches the desired colour, remove with tongs and pat dry with paper towels.
• Pink eggs Soak four cups of chopped beets in the water and vinegar mixture for 30 minutes. Strain and let eggs soak for 30 minutes.
• Orange eggs Add 4 cups of yellow onion skins to mixture. Simmer for 30 minutes, strain, and allow eggs to sit in liquid for 30 minutes or overnight for a brighter orange.
• Yellow eggs Add 3 tablespoons of turmeric to the boiling water. Simmer for 30 minutes, let cool, and soak eggs in mixture until they reach the desired shade.
• Light blue eggs Add 3 cups of chopped red or purple cabbage to mixture. Simmer for 30 minutes, strain, and allow eggs to soak overnight for the brightest shade. These can be speckled to look like Robin’s eggs and placed in a nest for a pretty spring decoration.
• Dark blue eggs Add 4 cups of blueberries to mixture. Simmer for 30 minutes, strain, and let eggs sit in liquid for 30 minutes or more for deeper tones.
The supplies you need for these projects are minimal. If you don’t have egg-colouring dyes, you can use food colouring. If you don’t have food colouring in your pantry, you can use markers or gel pens. Even Kool-Aid works great as a dye! You can even use glue to stick found things from around the house onto the egg. Or, as we already mentioned, you can even use discarded vegetable peels.
There really is no limit on how to dye and decroate an egg. Have fun with it!