

1. Place a large tarp on the ground below the eaves to catch debris that slides off the roof. A rented bin placed close to the workplace is an ideal receptacle for loosened shingles.
2. Build or rent scaffolding that allows easy and safe access to the roof.
3. Wear a safety harness and rubber soled footwear that grip shingles and substrate.
4. Standing on the scaffold, slide a shingle-removing shovel or fork under the first course, prying upward to loosen nails or staples.
5. Attempt to remove large sections of shingles that can be guided into the rental bin. (This may require the assistance of a helper as asphalt is heavy.)
6. Continue to work upward until all shingles are removed from the board, plywood or OSB substrate. (On a gable roof, I prefer to complete one side at a time as I do not own a professional roofer’s tarp and live in fear of a sudden deluge.)
7. Check the substrate carefully for un-pulled nails or staples as well as rotten sections that must be replaced; finally, sweep off any fragments that might puncture new shingles.
8. Nail metal drip edge to the roof’s gutter and rake edges to prevent ice and water from leaking under the shingles; overlap joints about 3-inches.
9. Purchase starter strip from a building products store that stocks self-adhesive membrane in 6-inch-wide by 75-foot-long rolls for about $50 each. Alternatively, buy 12-inch-wide asphalt strips with a perforated line that allows them to be easily separated into two strips, each 6-inches-wide by 39-inches-long. If you have unused three-tabs from a previous job that have been stored in a clean, dry place, snip off the tabs to create your own starter strips. Cut your first starter shingle about 6-inches shorter than a full-length shingle to ensure joins overlap; otherwise, you may encounter leakage problems.
10. Place asphalt starter strips over the previously installed drip edges, with the black adhesive patches facing upward and toward the edges; then, nail to the substrate with four roofing nails per length. For membranes, carefully remove a bit of the polymer backing to expose the adhesive; place boards under the sticky side to prevent the membrane from adhering to the substrate before it is lined up. Move slowly along the roof, removing the backing and boards as you go, using the drip edge’s outside crease as a guideline. Apply membrane in the same manner to rake edges.
11. For optimum results, use architectural or laminate shingles with a 35-plus year warranty. They cost only $1 per bundle more than soon-to-be-obsolete three-tabs and are a superior product. You will require a few bundles of ridge caps as well. Each full-length cap shingle has perforated lines that allow it to be torn effortlessly into three caps, much less time-consuming than cutting old three-tabs into caps with a knife or snips.
12. Use the 5-up, 6-inches off technique to start your shingling job. Lay a full shingle at the right or left corner of the roof, aligning it with your eave and rake edge starter strips. Cut the next shingle 6-inches shorter and nail it above the first one. Continue to shorten each succeeding shingle by 6-inches until you have completed five courses. Begin the sixth course with a full shingle, repeating the 5-up, 6-off pattern. (Read the nailing instructions printed on a bundle of architectural shingles; laminates require a specific nailing sequence to ensure that each full-length shingle is attached to the substrate with eight nails.)
13. For a small shed roof, a hammer and a bag of 1 ¼” to 1 ½” roofing nails are sufficient to attach shingles. For a larger area, say, 1,000 square feet or more, rent a pneumatic coil nailer and compressor or a gas-fired coiler from a building materials store. The time saved is worth the rental price.
14. If you do not trust your eye, run chalk lines spaced every 5 5/8” from one end of the roof to the other to keep your shingle courses straight. After you have covered about 1/3 of the roof’s surface, measure the distance from your last course to the roof’s peak at both ends. If there is a discrepancy of several inches, you can correct the error by readjusting chalk lines so they are about ¼” higher at one end than the other.
15. The last course should be laid close enough to the peak to allow the ridge caps to cover about a ¼” of the reveal. Too much coverage or too little will look odd from the ground.
16. Before installing ridge caps, read the instructions on a bundle to ensure you are nailing them correctly. Each cap should have a 5 5/8” reveal, similar to the shingles.
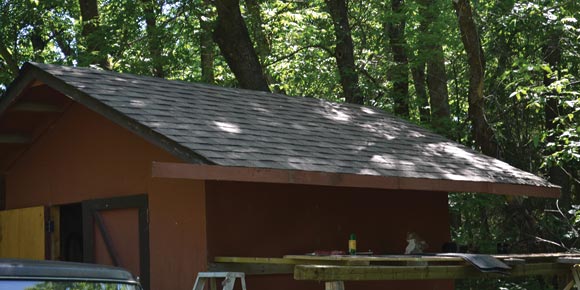
Stand back and enjoy the enhanced curb appeal your new roof has bestowed upon your house, shed or, perhaps, canine house.
davidsquare81@yahoo.com