

1. If you are removing an old fence, save the boards as long as they are not rotten; there is a market for weathered wood on sites like e-Bay.
2. Cut off the old posts at ground level if they were set in concrete to eliminate the time and hassle required to dig them out. (Layout your new fence so the post holes do not correspond with the old concrete ones.)
3. Run a taut string from stakes driven into the ground a couple of feet beyond the position of the first and last posts to ensure a straight fence line.
4. Place posts between six and eight feet apart, marking each hole precisely with a stake.
5. The ratio for the depth of a hole to a post is 1/3:2/3, meaning a nine-foot post requires a three-foot deep hole to safely accommodate a six-foot high fence.
6. For a standard 4”x 4” post, rent a two-man drill with an 8” auger to dig the holes; a one-man machine does not have the torque required to drill into Manitoba gumbo without stalling.
7. Pour 1” crushed stone into the bottom of each hole to a height of about 3” to facilitate drainage.
8. Lower a post into a hole and then drive two stakes firmly into the ground several feet from the base, aligned with two of the post’s perpendicular faces.
9. Screw one end of an eight-foot long 1”x3” to each stake, place a level on the post and, when level, screw the other end of the 1”x3” near the top of the post; repeat the procedure on the other perpendicular face to hold the post plumb and level.
10. If you have a lot of posts to set, the least expensive fills are ¾” down or concrete mixed at a ratio of one-part cement to three-parts sand to three-parts gravel. The down should be tamped as it is slowly poured in to a hole; concrete can be mixed in a wheel barrow or rented mixer—add only enough water to create a flowable material as too much water will weaken the concrete.
11. For small jobs, there are numerous pre-mixed concretes available; however, they can be expensive. Pre-mixed coarse cement retails for about $7.50 per 35 kg bag and fast-setting (no mixing needed as it is poured directly into a hole and water is added after) sells for about $11 per bag. Considering two bags of either product are required to fill an 8” wide by 3’ deep hole to just below grade, you are paying a huge premium for convenience.
12. Convenience is also a consideration when you decide whether to build from scratch or purchase pre-fab fence sections and gates. Ready built fence panels are usually 8’ long by 5’ to 6’ high. They cost about $150 per section, with or without lattice. Though they are quite easy to install (they do require a post at either end), they are badly constructed of nails, staples and butt joints. Moreover, the frames are made out of flimsy 2”x4”s that sag at the top and bottom when in place. Finally, the diagonal lattice pieces are paper thin and stapled together; as a result, the lattice can break while the fence panels are being screwed (nailed) to the posts. Pre-fab gates are no better.
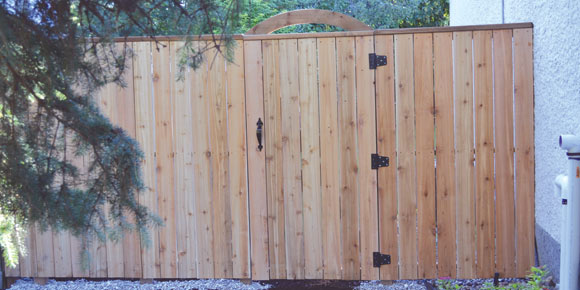
13. Though a DIYer may pay a little extra money and expend more energy on a custom-built fence, it will outlast pre-fab ones by many years and can be designed by the builder to reflect his/her artistry. For example, I recently made a fence for a customer that included pressure treated posts, rails and top plates as well as a gate with mitred corners and triangulated 2”x4s for reinforcement. The fence and gate were both constructed with brown deck screws and the best hardware I could find. For personal artistic expression, I added an ellipse band sawn from a brown-treated 2”x8” to the gate’s top plate.
As Robert Frost said, “Good fences make good neighbours.”
davidsquare81@yahoo.com