

In my last column, I related how to create a wood sink by hollowing out a Manitoba maple log with a gouge.
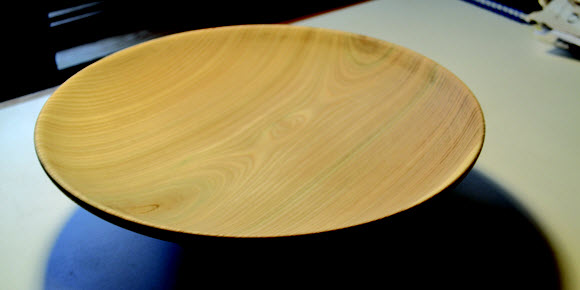
This week, I will demonstrate how to lathe turn an ash blank into a shallow sink.
Last week’s wind storm felled a healthy ash tree on my property, so I decided to use the green or wet wood to turn a shallow sink. The diameter of the trunk was a consistent 12-inches. With my Stihl chain saw, I bucked six logs, each 12-inches long, from the bole. The yield from each log was a one-foot-square by three-inch-thick turning blank.
I used a compass set at 11-inches to trace a circle on the surfaces of the blanks, and then I cut out circular pieces on my band saw. (If you want the circles of wood to be perfectly symmetrical, you can build a simple circle cutting jig for your band saw with a scrap piece of plywood and a nail as a pivot point. See www.startwoodworking.com.)
In my case, I eye-balled the cuts because thin, round blanks can be easily trued on the lathe. For a thicker blank, say six-inches, it can be useful to cut a perfect circle on a band saw, especially if you want to maximize the diameter of your piece of wood.
I used three No.14 by half-inch screws to fasten a faceplate securely to the bottom of a blank. Because the screws are driven into face grain, not end grain, they hold the wood firmly in position during the turning process.
When I mount a faceplate on end grain, I use three two-inch by three-eighths-inch lag bolts to secure the plate, otherwise the blank will work itself loose and become a hazard to the lathe operator. For very large blanks, I drill three half-inch by two-inch deep holes into the bottom of the blank and then epoxy long grain plugs into the holes. Using this technique, quarter-inch by 1 1/2-inch lag bolts are sufficient to secure the blank during the turning process.
Many woodturners prefer to shape the exterior of a bowl first, leaving a wood tailpiece that can be placed inside an adjustable chuck that holds the bowl while the interior is formed. (Bowl chucks priced from about $50 to $500 are available at Lee Valley.) I prefer the faceplate technique for turning large vessels of 12-inches or more, because a properly secured faceplate will not allow the turning to slip or change position during the wood removal process. The disadvantage to a faceplate is that the turner must avoid cutting too deeply into the bottom of the sink, otherwise the lag bolts’ tips will be exposed.
As I mentioned, the ash I turned was green, containing about 35-per-cent moisture. Working with green wood is both a joy and a liability, because the shavings peel off the gouge’s edge in lovely, long strips that I call angels’ wings. The downside is that the completed vessel will change shape and check while it dries.
There are many methods to prevent warping and cracking of wet wood. Some turners place a finished green vessel inside a microwave, setting the oven for one or two-minute cycles to drive off the excess moisture without burning the wood. I haven’t attempted this, because we don’t own a microwave.
Another technique is to rough turn the vessel, then set it aside to dry until the moisture content falls to about 12 percent, at which point, the sink can be completed. Yet another possibility is to brush a coat of a wood stabilizer like Pentacryl onto all sides of a green vessel. (See www.preservation-solutions.com for more information.)
Whether a sink is turned from green or dry wood, the completed vessel will require three coats of a two-part epoxy to ensure the wood will not be exposed to soap and water. West System makes an excellent, though pricey, waterproof epoxy that is available from Lee Valley and stores that specialize in boat accessories. Lee Valley sells its own G-2 and cold cure epoxies that are less expensive than West System.
The set rate of two-part epoxies can be controlled by the amount of hardener or catalyst added to the resin. Generally, less hardener will result in a stronger glue that takes longer to cure. To be safe, allow 24-hours at room temperature between coats.
For a silky-smooth finish, sand each layer of epoxy with No. 360 wet/dry paper. The final coat can be buffed with No. 1200 emery paper.
In my next column, I will show how I combined the gouge-carved sink of Manitoba maple with the highly-finished ash sink to create a two-part vessel with an upper and lower basin.