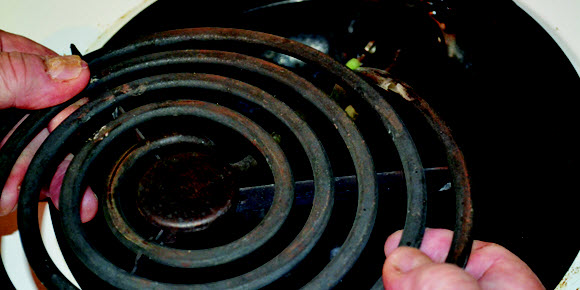
It is simple to replace burnt out elements and receptacle blocks on a traditional kitchen range.
Only a few basic tools are needed: a wire stripper/cutter, a Robertson No. 2 screwdriver, a file and a flashlight.
Moreover, new parts like six-inch or eight-inch elements and matching receptacle boxes are quite inexpensive and readily available at most hardware stores.
Before you begin, unhook the stove by removing a large, three-pronged male plug from a 220-volt female receptacle, usually located behind the range. Alternatively, shut off the stove’s 40-amp, double-pole breaker found inside your home’s electric panel.
If a stovetop element is not heating up or is working intermittently when turned on, then you have two likely problems: the burner needs to be replaced or the receptacle box should be replaced. Sometimes, it is not a bad idea to do both.
An electric burner is easy to remove. Push it forward toward the hole in the drip pan to unlock the tab at the back of the element. Then lift the burner upward and pull its male connectors gently out of the receptacle box located underneath the stovetop.
The drip pan can now be removed for cleaning and the element inspected for signs of wear. Check the ends of the burner’s connectors. In the majority of cases, they will resemble closed wire loops or flat pieces of metal about the size of a dime.
Discolouration or black areas on the connectors indicate electrical arcing, caused by a loose fit between the connectors and the female contact points inside the receptacle box. It is possible to file the discolouration off the burner’s male points and then test the element with a voltage meter. If the burner is working, there is a problem with the receptacle box.
To gain access to the receptacle box and wiring harness, open the stovetop by grasping either side under the front edges and lifting firmly upward. This will release friction catches that hold the lid in position during operation. As you continue to move upward, two metal rods will slide out of holes on either side of the lid. When the top is fully open, the rods automatically lock into position, supporting the stovetop like car’s hood. There is now sufficient room to inspect and work underneath the lid — a flashlight or trouble light is helpful.
A receptacle box is a heat-resistant polymer container with two contact points inside. The box is held in position by a metal bracket attached to the underside of the stovetop by a single Robertson No. 2 sheet metal screw. There are two basic bracket styles: one has a tab set at a right angle to the bracket and is screwed to the lip of the burner hole, while the other has a tab set parallel to the bracket and is screwed to the underside of the stove’s top. When purchasing a new receptacle, take the old one to your hardware store to ensure you purchase the correct bracket for your range.
To remove the receptacle box, locate and undo the Robertson screw with a No. 2 driver. The metal bracket and box will drop into your hand. Now use a wire cutter/stripper to snip the two leads that connect the receptacle to the main wiring harness near the stove’s back.
Mark the length of one wire with Whiteout so the polarity will remain the same when it is reconnected. (Some wires are colour-coded so this step is unnecessary.) Lift the receptacle out of the stove and remove it from the bracket by pulling the metal sides slightly apart. This will release tabs on either side of the receptacle that secure it to the bracket.
Using a flashlight, look inside the receptacle’s two holes which are separated by a non-conductive polymer wall. Each hole has two copper contact strips, similar to a household wall outlet. If the copper strips are loose and charred, the receptacle will no longer conduct electricity and must be replaced.
Installing a new receptacle is easy, as long as you have the correct bracket to fit your stove. The ends of the wires on the receptacle are pre-skinned as a convenience. Your main job is to strip about a half-inch of insulation off of the two wires you previously cut near to the main harness. Use the two ceramic connectors included with your receptacle kit to twist the bare ends of the two wires safely together, remembering correct polarity.
Finally, place the receptacle and bracket into position and secure the bracket with a new Robertson screw, also provided with your kit. (Keep the old one, just in case.)
I am an old fuss pot when it comes to fixing things, so I replaced both the six-inch element and the receptacle on my range. The burner cost about $30 and the receptacle kit about $20. Though it pained me to take $50 in quarters out of my piggybank, I was consoled by the thought that I had saved three times that amount by DIYing!


