

Replacing an electrical outlet, switch or breaker can be accomplished by a DIYer or, for that matter, anyone equipped with a few basic tools.
Caveat: Be sure to shut off the power supply before starting work.
The tools required are needle nose pliers, Roberston, Philips and slot blade screwdrivers and, perhaps, a set of Allen wrenches. Duplex outlets can be purchased at a hardware or lumber store. They are normally available in dark brown, beige or white for $1 to $3, depending on quality.
Before you attempt to replace an outlet, plug a lamp into it and then switch the 15-amp breakers in the main panel to the “off” position until the light goes out. Some panels will have stickers beside each breaker identifying the circuits in the house to which they are wired.
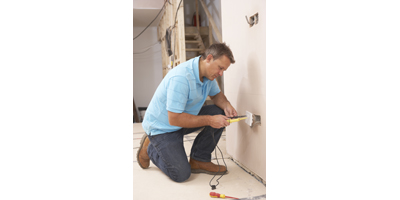
To begin, remove the face cover by untightening the single screw, which holds it in place, with a slot blade screwdriver. The outlet itself is held in place by long screws at the top and bottom, which require either No. 1 or No. 2 Robertson screwdrivers to remove. (If the outlet was manufactured in the U.S., you may require a Philips screwdriver instead.)
When the screws are removed, pull the outlet out of the metal box in which it is enclosed by grasping the top and bottom. There should be enough wire inside the box to allow the outlet to be pulled free of the box, exposing the screws which connect wires to the outlet. The screws should be silver-coloured on one side of the outlet and brass-coloured on the other. There also should be a green-coloured screw to which the ground or bare wire is attached. If the wiring is old and there is no ground wire, the outlet can be replaced with a ground fault circuit interrupter (GFCI) which trips the circuit if there is a short. GFCIs cost anywhere from $6 to $11 at hardware or lumber stores.
The green ground screw will have a flat, Robertson or Philips head, depending on where and when it was manufactured. New outlets sold in Canada are standardized for a No. 2 Robertson head. With the outlet free of the box, you should find two black wires attached to the brass screws and two white wires to the silver screws on the opposite side of the outlet. A single bare copper wire should be attached to a green screw at the top or bottom of the outlet. This wire should be also secured to a ground screw at the back of the electrical box. If the outlet is at the end of a circuit, it will have a single black and a single white wire as well as a ground one.
Loosen all the screws until they stop turning, then use needle nose pliers to remove the wires. Properly installed wires should have bare copper hooks at the end bent in the same direction (clockwise) as the screws tighten. Replacing the old outlet is a simple matter of re-attaching the wires to the correct screw terminals on the new outlset. Needle nose pliers are useful to re-bend hooks around screws.
Kitchen countertop outlets may have a black and a red wire connected to the brass screws. In this case, remove the link between the break-out plate that joins the top of the outlet with the bottom. This wiring arrangement is known as a split receptacle, allowing the top and bottom of the outlet to be on separate circuits. The silver side of the break-out plate where white wires are connected is left intact; the ground wire is attached as in a single circuit outlet. A simple device called a polarity tester can be plugged into a new outlet to ensure that a black wire hasn’t been attached to a white terminal and vice versa. A LED diode on the tester will glow green to indicate everything is A-okay.
Replacing a single-pole light switch is similar to replacing a single circuit outlet. The only difference is that the switch has two brass screws on one side and no silver on the opposite — it will have a green ground screw, however. Remove the old switch from the metal electrical box as you would an outlet. In most cases, black wires will be attached to the switch with two brass screws, while white ones will be connected with a solderless connector, sometimes referred to as a Marquet connector — a plastic cap with a copper coil in the bottom available in different sizes and colours depending on the size of the wire in use. As most household wire is 14 or 12 gauge, yellow connectors are suitable for the job. Ground wires should be attached to the box and capped with a solderless connector.
In situations in which the 120-volt power supply goes to the light first, the switch will have a white wire connected to a brass screw and a black wire connected to a second brass screw. The ground wire is attached to a screw at the bottom of the electrical box only.
Three-way switches tend to be a little more complicated because they require cable that contains black, red, white and ground wires. These switches are slightly more expensive to buy, but replacing them is relatively easy as long as you remember to colour code the screws on the original switch or dry a diagram of where each wire is connected before disconnecting them.
Three-way switches have one black screw at the top and brass screws at the bottom on opposite sides. The red wire is generally connected to a brass screw at the bottom of the switch. The black one is connected to the black screw at the top, as well as to the remaining brass screw at the bottom. The white wire is joined with a solderless connector, as is the bare wire which is also attached to the ground screw inside the box.
Replacing a 15-amp single-pole breaker is actually easier than changing a three-way switch because a small breaker only has a single black wire to unscrew. Before proceeding, turn off the main breaker, usually located at the top of the panel. Modern panels are equipped with a 100 to 200-amp breaker which should be clearly marked. This will cut off all the power to your house so have a new breaker in hand and the tools required for the job close by. (A common 15-amper should cost around $8.)
With the power off, unscrew the front of the panel and place it out of the way. Generally, breakers will run down both sides of the panel box. The lower amp ones are sometimes grouped on the opposite side to the big boys that control dryers, stoves, water heaters and other power gulpers. You will likely need a slot screwdriver or hexagonal Allen wrench to loosen a set screw that fastens a black wire to the breaker.
Back off the screw until the wire is loose enough to be pulled out of a hole in the breaker. (Needle nose pliers can be helpful here.) Next, grasp the front of the breaker and pull it toward you. This will disconnect the contact points, allowing it to move sufficiently forward so that another tug at an outward angle will release the breaker from a slot that secures it to the back of the panel. Some breakers are screwed into position, but the fasteners will be easy to see once the panel cover is removed, though it is anyone’s guess as to the type of screw-head you will encounter.
Replacing the new breaker is as simple as locking or screwing it into position by reversing the instructions above. Push the black wire back into the appropriate hole in the breaker and tighten the set screw. When the panel cover is re-secured, flip on the main breaker and rejoice — you are the light!