

Do you know how to caulk — or even what caulk is? It’s something you rarely notice, but there it sits every day doing some pretty important work in your home. Once applied, this thin line of goo hardens to seal cracks around tubs, windows, and other crevices, stopping leaks, drafts, and other nuisances and saving you money in the process.
Caulk serves multiple purposes: It lowers heating and air-conditioning bills by reducing air flow into and out of the home; it prevents moisture that can cause wood rot, mold, mildew, and water damage; and it keeps insects and other pests out.
So taking care of your caulk is clearly an important maintenance measure in any home. And luckily, it’s a fairly simple task most homeowners can do on their own with just a little know-how. So let’s talk caulk and learn how to apply and maintain this all-important stuff.
Inspecting and repairing caulk should be done every year, both inside your home and out. On the exterior of the home, caulk should be applied around door and window frames, where siding materials join together (joints, corners, and angles), and at the joints between siding materials and trim panels. On the interior of a home, caulk should be applied around faucets, bathtubs, showers, vents, and electrical outlets on exterior walls.
Step 1: Select the correct type of caulk
According to Sassano, latex caulk is ideal for indoor projects in dry areas like around windows and doors; it comes in a variety of pre-tinted colors and cleans easily with soap and water while in liquid form. For outdoor projects, either silicone or polyurethane caulk varieties are best.
Silicone typically cannot be painted, though polyurethane can and will actually require it as it is not protected from UV rays. These types are much more heat-resistant and waterproof, and therefore require paint thinner to clean up since they are solvent-based. The polyurethane type, because it is waterproof, is best for around tubs and showers.
Step 2: Remove old caulk
One of the biggest mistakes people make is insufficiently removing old caulk before reapplying. These bits and pieces can keep the new caulk from adhering properly, resulting in the very leaks you’re trying to prevent.
So to start, use a caulk remover to soften the pre-existing caulk. Once it’s soft, you can use a utility knife to slice through it. If there are several layers of old caulk, you may need to use needle-nose pliers to pull the old caulk out or chip away at it using a putty knife or chisel.
Step 3: Clean and dry the surface
Once old caulk has been removed, use rubbing alcohol to clean the surface. Sassano suggests also using a mixture of one-third cup bleach to 1 gallon of water to kill any mold or mildew. Allow it to completely air-dry for at least a few hours before applying new caulk so it will adhere well.
Step 4: Apply new caulk
Cutting the caulking tube correctly is essential to a good caulking job. While some tubes come with a built-in cutter to remove the tip of the tube, you can also cut it with a knife at a 45-degree angle.
Don’t cut too low, as the tube is graduated and cutting too low will leave you with too large an opening that is difficult to work with. You want to cut the tube so the hole is smaller than the caulk line you want to create.
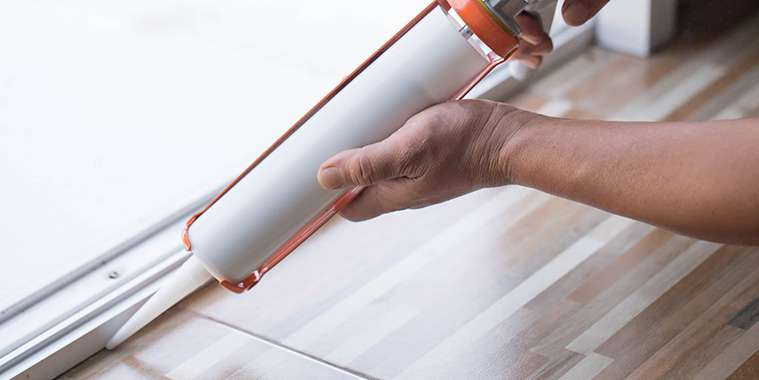
The caulk line you will create is called a bead, and you want to continuously apply an even bead. You can either push the tube away from you or pull it toward you — whichever method offers you the best control to complete an even line. Sassano says if you’re a caulking beginner, you may want to begin by surrounding the area you’re caulking with painter’s tape or practicing first on some spare wood.
Step 5: How to tool caulk
Tooling” is the term for smoothing the caulk bead after you pipe it in. Clement says too often people skip this step, which leads to messy looking results.
While you may need a caulking tool if you’re using a silicone or polyurethane caulk, for latex caulk, you can use just your finger and some water to do the tooling. However, don’t use a paper towel to clean your fingers off while tooling.
You’ve lost before you started. Instead, get a bucket of water and a grout sponge and wipe your finger off on the sponge. Be sure to change the water from time to time. Trying to do it dry is like trying to wipe gum off.
— realtor.com