

By David Square
Replacing old siding is an opportunity to add insulation to outdoor walls to reduce heating/cooling costs and increase your home or cottage’s value; new cladding will give your building a dazzling appearance to attract buyers and neighbourhood admirers.
Many houses and cottages constructed in the 60s, 70s, and 80s are covered with 4’x8’ sheets of T1-11, a 3/8” plywood embossed with vertical lines to imitate solid wood bevel siding.
If your building’s siding is T1-11, it is likely rotting around door and window frames, as well as areas close to the ground. Rotten pieces can be cut away with a builder’s saw, then carefully patched with Ranch Wall, the modern equivalent of T1-11.
The smooth, non-beveled surface of T1-11 or Ranch Wall is an excellent substrate for panels of foam insulation.
A Winnipeg-based company produces foam-board insulation with wood nailing strips embedded in the polystyrene every 16” or 24” OC to accommodate stud spacing. The 3/4” thick by 2 1/2” wide plywood battens run the length of each sheet (usually 4’ wide x 8’ or 10’ long). The sheets are backed both sides by metallic polymer facers to prevent moisture penetration, similar to a vapour barrier. Two-inch-thick sheets have a 13 R-value.
Materials:
• Ranch Wall to patch old siding
• Sheets of foam required = square footage of outside walls divided by 32 or 40
• Four or five rolls of 300 square foot Typar or Tyvek
• Red Tuck Tape, silver foil tape, door and window spray foam
• Vinyl siding (pamphlets show how to calculate the siding required for your building)
Hardware:
• 3½” coated deck screws
• 1¼” hot dipped galvanized roofing nails
• Staples
Tools:
• Stapling gun, sharp knife, tin snips, builder’s saw, screw gun, long level, ladders or scaffolding, snap lock
Start by stapling the Typar/Tyvek to the top edge of a wall at mid-point. Allow it to drape to the ground and with a friend’s help, smooth the material tightly across the substrate to prevent folds. Staple the air barrier in position as you work. Leave a generous overlap when joining two sheets. Cut out window and door openings with a sharp knife.
Temporarily attach the corner of a sheet of foam board (short 4’ side up) to the top edge of a wall, selecting the first stud from the corner as your starting point. Level the sheet to align its embedded strips with the wall’s studs and tack it into place with the embedded furring strips facing outward.
Use spray foam or silver foil tape to seal the T&G joints between sheets to prevent air leakage, the main source of heat loss. Use coated deck screws of sufficient length to secure the foam board tightly to the substrate; fasteners should penetrate the studs by 1”.
Use a builder’s saw to cross cut sheets and a sharp knife to rip them.
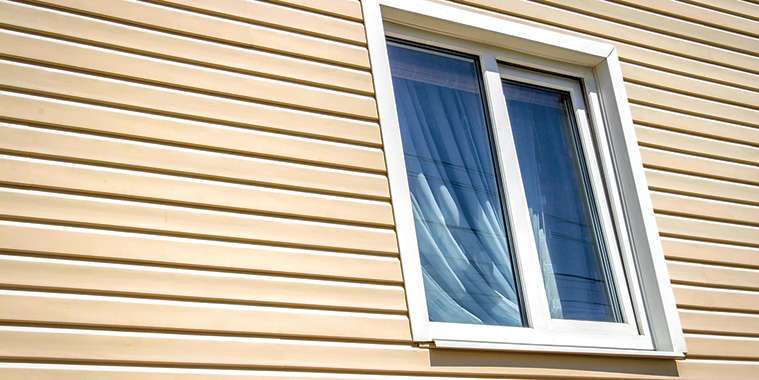
Now it is time to install the siding. For this column, I chose vinyl because it has become one of the most popular claddings on the market, available in light to dark-figured colours. Darker vinyl is about twice the cost of lighter material as it is more rugged and requires a special manufacturing process to add deep colourants.
For DIYers, vinyl is an easy cladding to install. The first and most important step is to ensure you have a line scribed into the bottom edge of exterior walls. The line must be the same level on all walls; otherwise, the siding will not meet at the corners.
Vinyl manufacturers recommend installing outside and inside corner posts before attaching starter strips. When the corners are in position, line up the top edges of the strips with your level line and use 1 1/4” galvanized roofing nails every 10” in the middle of the back slots. Leave 1/32” between the nail’s head and the strip to allow for expansion and contraction of the vinyl. Also, leave 1/4” between each starter strip, as well as between posts and strips.
From this point, clip the bottom edge of a full length of siding into a starter strip. Nail the siding into the middle of the preformed slots every 11”. Overlap pieces by no more than 1” as you continue to add siding. Place the overlaps so they will be in the least visible line of sight.
Aside from the improvement in the quality of vinyl siding since it was introduced in the late 50s, the newer versions are popular because the colours are stable, the installation is simpler and it can be cleaned with a power washer filled with a mixture of 70% water to 30% white vinegar. Moreover, the cost of vinyl is less than cement board, metal cladding and wood sidings — the latter need to be stained or painted frequently if you do not want them to turn grey.
davidsquare81@yahoo.com