

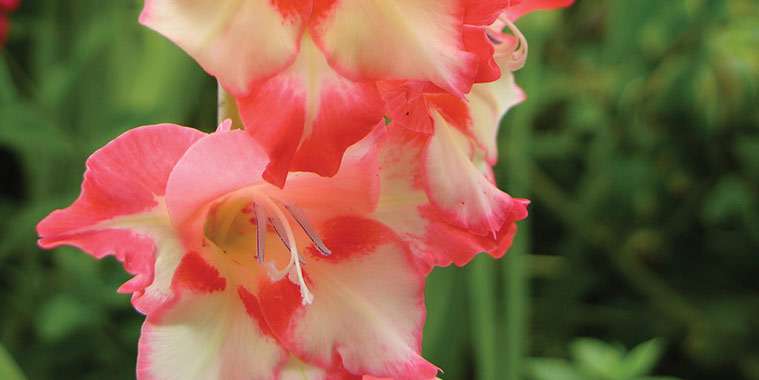
Gladiolus, named for the Roman word “gladius” meaning sword, (the singular is gladiola) are coming back to a garden outlet near you. This wonderful plant is grown from a corm planted early in spring, once the ground has thawed and warmed.
Originally, from southern Africa, they grow wild in sunny fields and in spite of their exotic look, are easy to grow in our local gardens. Simply plant the corms in holes four to six inches deep, toss in some bone meal for fertilization, cover, water and wait. They mature anywhere from 60 to 120 days, depending on the variety. Watch what it says on the package and look for the shorter blooming time in our climate if you wish to plant them out directly.
The other thing to watch for is height. With over 250 species, it is easy to understand that they come in many different sizes from one foot tall to over five feet. The taller varieties need staking and are probably not the best bet in a windy place such as Manitoba. If you do decide to take the plunge with these giants, know that they will need to be staked.
The right side up on a gladiola corm can be tricky to determine. Corms are round and sort of flat. The top is the side with a point and sometimes a little bulge from which the point emerges. The flatter, concave side is the root side. If you accidentally plant the corm wrong side up, though, chances are it will right itself as the shoots begin to emerge. The corm comes with a little tunic. Leave this on as it protects the corm from insects, water loss and so on.
Plant gladiolus as you would tulips – in groups of uneven numbers, a few inches apart. Dig a hole large enough to accommodate five to seven plants. Nestle the corms in to the soil where you have scattered a handful of bone meal. Cover and water. Adding two to four inches of mulch will help to keep moisture in because corms, unlike some bulbs, do not like it dry. Not enough moisture can slow their growth. Be sure to water occasionally as they grow.
As the sword-like leaves emerge, you may wish to push some bamboo stakes next to them (or use prunings from your shrubs). Start planting about two weeks before the last frost, then, if you want to have cut flowers for the longest possible time, plant another batch 10 days later and, if the season will permit, even one more time in another ten days.
Cut the flowers early in morning or last thing in the evening, when the day is cooler. Cutting when only the first flower has opened will keep your vase fresh for the longest period. Remove spent flowers from the stem as they fade.
I used to save my corms from year to year and it just takes a little planning and a very small amount of work. Before the first frost, dig up the whole plant and cut the stalk an inch or two above the corm. You will notice a spent corm attached to the new one from which the stalk emerges. Leave this for now. Allow the corms to dry out in the sun (weather permitting) or in a warm, dry, airy place for a couple of weeks. At this time, remove the spent corm. Dust the new corms with fungicide by placing them in a paper bag and shaking them up. Then store them in a cool dry place until next spring.
You will probably discover some cormlets in the mix. You can keep them and replant next spring. It takes two to three years until you will have a viable new corm but you can increase your favourite varieties this way.
Dorothy Dobbie is the publisher of Manitoba Gardner Magazine. For subscriptions call 204 940 2700 or go to the web site at localgardener.net.