

Part one of two.
I read a story recently about an American DIYer who started a worldwide phenomenon from his garage workshop.
Tod Bol of Wisconsin built a “Little Free Library” to honour his deceased mother, June, a schoolteacher who had taught in a one room school house as well as tutored children from her home.
Bol’s first library had a gable roof shingled with handmade shakes, a framed plexiglass door that allowed a view of and access to books inside; the entire recycled wood structure was supported on top of a 4-inch by 4-inch post sunk 2-feet into the ground.
It took neighbours about a week to realize the new structure installed near the front of Bol’s property line was a free miniature library from which books could be taken or left.
When Bol passed away in October 2018, there were 75,000 of his “non-profit book exchanges” throughout the world, including several in Winnipeg.
As a reader of how-to books as well as swashbuckling tales like The Count of Monte Christo, The Three Musketeers, Ivanhoe and, of course, anything by Louis L’Amour. I decided to build and set up my own mini-library near my home in rural Manitoba.
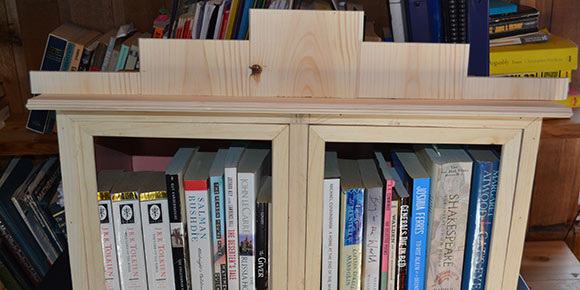
As I’ve always been fascinated by false front buildings, I decided to design my library based on this quintessential western style, examples of which still exist in small towns in Manitoba.
There are no set dimensions for little libraries, so I began by measuring the sizes of various hard and paper back books to calculate the interior measurements of the case or box. I did not want the case to be so big that it was unwieldy; however, I did want it to contain about 20 books to offer people a good selection of reading material. Also, for the design to look best, I discovered that an outside width and height (including the false front) of 24-inches by 16-inches was the most visually pleasing. This was not surprising as the dimensions are very close to the ubiquitous golden ratio of 1 to 1.6, discovered by the Greeks and used by architects and artists ever since.
To build this project, you will require:
4-foot by 4-foot by ½” sheet new or recycled plywood
24-linear feet ½-inch by 6-inch T&G spruce or pine
2-pieces 9 ½-inch by 10-inch plexiglass
2-sets ½-inch by 1 1/2-inch brass mortise hinges
2-door knobs and catches
4-packs wood shims, pine or cedar
1-quart gel stain, quart exterior urethane, brown or clear caulking, two asphalt shingles in good condition
Start by laying out the top, bottom and back on ½-inch plywood and cut them out with a jig, skill or table saw. Layout the sides so there is a 5-degree slope between the front edge and back edge of each piece to create a shed roof for drainage. Bevel the top edge of the case’s back at 5-degrees so the roof will sit flat on all edges.
If you desire, fasten the pieces together with rabbets or whatever joints you desire. (I used simple butt joints because they are fast to cut and when assembled, this simple technique creates a box strong enough to stand on without recourse to special joinery.)
Use #6 by 1” screws (countersunk) and Loctite PL 400 construction adhesive to assemble the case. Construction adhesive in tubes is waterproof, less expensive and easier to work with than two-part epoxies or polyurethanes.
When your box is completed, measure diagonally from corner to corner to ensure it is square. If the two measurements are equal, you are good to go. If not, position a bar clamp from corner to corner of the longer measurement, tightening the clamp until both diagonal dimensions are equal. You may have to resort to interior corner braces to keep the case in square.
You are now ready to construct the door frames, fit them with plexiglass and add the wood features that define a false front building.
Part two will run next week.
davidsquare81@yahoo.com