

• Brass screws look better than steel ones, but because brass is an alloy of copper and zinc, it is softer than steel. When working with brass fasteners and a hardwood like oak, it is therefore essential to drill a pilot hole into the wood which is slightly smaller than the screw; otherwise, the brass shank will break as the screw is turned into the oak. As a rule of thumb, a pilot hole one half the width of a brass screw will prevent the screw from breaking and provide sufficient grip for the threads to hold tightly and firmly in the wood.
• Tighten a pair of vise-grips around the shank of a broken screw and turn the pliers counter-clockwise to remove the fastener.
• A stripped screw can be tightened by removing it from its hole, increasing the hole about 1/16-inch larger than the original, and then filling the new hole with a plug cut from the same wood. Glue the plug into position with fast set epoxy, waiting about one hour before drilling a new pilot hole for the screw. (I’ve used plane shavings to secure stripped screws but have neve been satisfied with the results.)
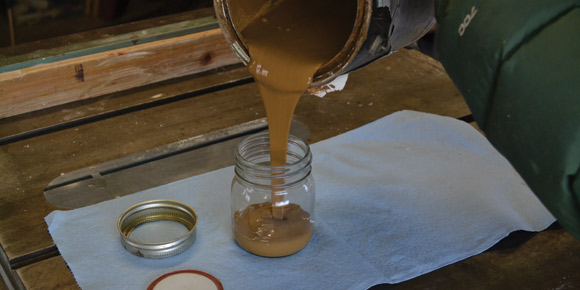
• Every year, thousands of litres of paint are wasted by DIYers (I’m as guilty as the next) who use one-half of a can of paint and then store the remaining paint in a garage, basement or mud room. If the lid of the can is not properly sealed, which it rarely is, air infiltration will ruin the paint. As properly sealed latex paint can last for 10 years and oil-based alkyd for 15 years, it is worth the effort to ensure leftover paints are well sealed. One solution I like is to pour unused paint into glass sealer or Mason jars with a lid with a rubber gasket: fill the jars to remove as much air as possible and hand tighten: the glass container lets you see the colour of the paint.
• Plastic containers with a screw on lid will work almost as well, though they should be kept in a dark room to prevent breakdown of the plastic by sunlight over time. Another method is to purchase new half-litre or larger cans from paint companies. When filling the cans, make sure paint does not get into the groove that forms the seal between the can and the lid. (Sherwin-Williams on McPhillips is a source of paint cans.)
• Paint that has been stored for a long time should be thoroughly re-mixed to ensure consistent viscosity and even colour. Fashion your own mixing paddle from a ½-inch by 8-inch bolt and two ½-inch nuts. Remove the bolt’s head with a hacksaw or angle grinder and file off burrs. Drill a ½-inch hole in the middle of a piece of hardwood about 4”-long, by 2”-wide and 3/8-inch thick. Screw a nut onto the threaded end of the bolt, place the wood (paddle) over the nut, and then screw a second nut onto the bolt to secure the paddle into position. A flat paddle will work, but if you are inclined, shape the wood into a propeller to optimize mixing speed and efficiency. As the paddles are easy to interchange, you can have several different sizes on hand to mix small or large batches of paint.
• If you fear the idea of taping drywall, then your phobia is likely based on the too much mud and too little muscle application theory. Pros generally thin a new pail of mud with ½ cup of water, thoroughly mixing the two ingredients (with your homemade paddle) until the mud has a butter-like consistency, flowing freely over drywall and tape without drooling or sagging. The biggest error DIYers make is to hold a trowel loaded with mud almost perpendicular to a wall, spreading a thick layer of compound over a seam. After applying three coats like this, the mud will be much too thick, requiring hours of sanding to flush and feather it to the drywall. As well, clouds of sanded compound dust will float in the air, clogging your lungs and eyes. To tape properly, mud should be applied to the long side of a trowel. Holding the trowel about one inch from the tape, draw it along the seam with considerable pressure until the blade is nearly flat to the seam. Add more mud to the trowel and continue in the same manner until the entire length of the seam is covered with a thin layer of mud, feathered on both sides with light sanding. Using wider trowels, apply two more coats with the same technique. When dry, the mud should require a light sanding to feather the edges, nothing more.
davidsquare81@yahoo.com