When I come across a length of hardwood with a spectacular figure, I slice it into veneer on the band saw to make it go further.
My old Rockwell band saw will cut boards up to six-inches in height with minimal effort, since I swapped the original half-horsepower motor for a one-horsepower model. I find that a 3/8-inch blade with six teeth per inch yields the best results, however, some woodworkers prefer a half-inch blade for this job.
The figured boards I work with are generally about four feet long, as anything beyond this length is unmanageable in a one-man shop. It’s a good idea to have an adjustable roller on the exit side of the saw’s table to support the board as it is pushed through the blade.
I begin by drawing a cutline on the top edge of the plank with a marking gauge. I slice the veneer to a quarter-inch thickness to allow for machining afterwards. A new or freshly-sharpened blade will prevent burning or wandering in the kerf as the veneer is cut.
Also, I ensure the blade guides are properly adjusted before switching on the saw. I don’t use a fence. Instead, I prefer to guide the wood by eye along the cutline. A band saw rarely cuts in a straight line. The kerf is always skewed to the left or right of centre, which is referred to as blade drift. When slicing the veneer freehand, I compensate for drift by keeping the stock angled so that I can follow the cutline.
If you are uncomfortable guiding the stock freehand, you can use a dowel as a single-point fence to brace the plank, but still guide it through the blade at an angle. If you plan to do a lot of re-sawing, a rip fence adjusted to the angle of drift will speed up your production.
Another alternative is to purchase a larger machine with more horsepower that will facilitate a one-inch or wider blade. The Canadian Woodworker sells a Rikon band saw/re-saw for about $1,200 with a 1 1/2-horse motor that will slice up to a 13-inch wide board.
After each cut, I run the block of wood through a jointer to prepare a clean surface for the next cut. This may not be necessary if your band saw yields a flat surface straight from the blade. However, as my machine is getting old and the guides are not as tight as they once were, I find it necessary to resurface the slightly bumpy kerf after each pass through the blade.
Then I make a new cutline with the marking gauge and begin the next cut. This is unnecessary if you use a fence that has been adjusted to compensate for blade drift.
When I have finished cutting the board into veneer, I run the rough side of each sheet through my planer so that the finished veneer is 3/16-inch thick. I place a thick backer-board between the planer’s table and knives to prevent warping or splintering of the sheets as they pass through the machine. A backer-board also helps to eliminate tear-out from figured stock. Interestingly, slightly dull planer knives are less likely to cause tear-out than razor sharp ones.
Some highly-figured veneers will tear out when pushed through a planer no matter what you do to prevent it from happening. In such a case, I glue the veneer in place with the smooth side down and then finish the rough top side with a four-inch belt sander, starting with 80-grit and progressing to a 120-grit finish.
If the veneer is hard maple, you can sand it hard without worry about cutting through to the substrate. Softer woods such as walnut or cherry require a little more care. If the kerf marks are not deep, a light 120-grit sanding may be all that is required.
I stack the finished sheets of veneer (called a flitch) in the same order they came from the band saw. This is common practice as it allows the ebeniste to match the figure of the wood when it is used for book or slip-matching.
A hand-cut flitch of veneer with a magnificent figure can be used to create a stunning keep-sake box for that special person in your life. Several coats of hand-rubbed oil or varnish will intensify the beauty of the wood.
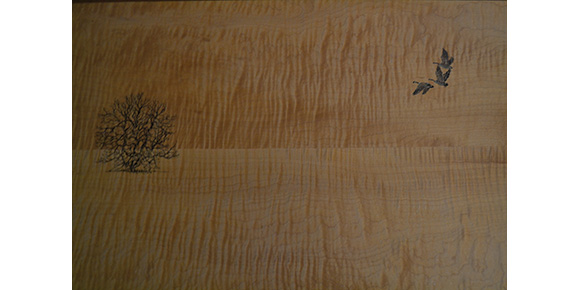
The picture is of a small table top I veneered with hand-cut curly maple. It has pen and ink drawings by my wife, Penny.


