

For most Canadians settling in for several months of winter, finding ways to keep warm while relaxing is at the top of the to-do list. If that mindset coincides with your taste for do-it-yourself projects, then three-fold fulfillment could lie in a DIY sauna!
Saunas have been used for many centuries, holding a range of health benefits for arthritis sufferers, and to simply relieve stress. But like any do-it-yourself project, it’s best to understand what’s involved before moving ahead, so let’s dive into the hot topic of DIY saunas.
Types of saunas
There are three main types of saunas: dry saunas, steam rooms, and infrared saunas. Dry saunas have a special heater or wood stove which uses rocks (usually volcanic) to radiate heat, while steam rooms use a small generator that boils water to produce steam, which is released through steam heads.
Infrared lamps and panels come in two main types. The first and more common type uses low- or medium-infrared light (also called near-infrared) and heats the entire space, often incorporating a ceramic or carbon heating element. The other is known as long-infrared (also called long-wave infrared, or far-infrared) which uses lightwaves to heat up your body, without raising the temperature of the room. While long-infrared panels are the safest and most efficient, they carry a larger price tag.
If you’re planning to build a steam room, steer clear of infrared heat sources, as they’re only suitable in dry saunas.
Budgeting
Due to the complexity of this project, and the requirement for specialized building and insulation materials, this DIY can carry a hefty price tag. With some intuitive material sourcing, you can keep expenses below $3,000 when building from scratch, but if you look towards kits and professional installations, your costs could reach the range of $15,000 or more — it all depends on what you’re looking to do.
Choose your location
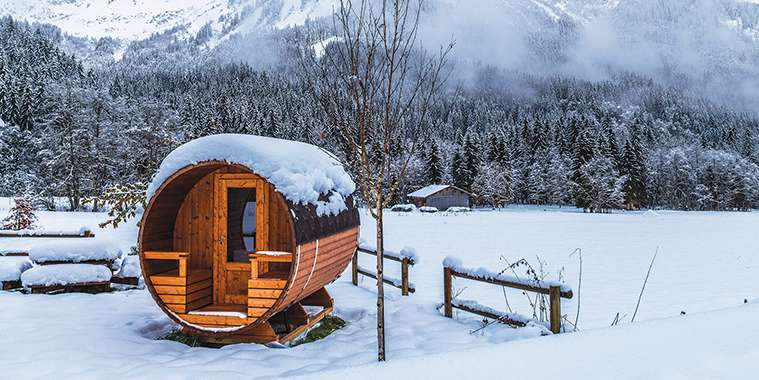
You may have the perfect spot in mind for your DIY sauna, but if not, available space and budget may dictate the best location. The backyard makes the perfect spot to erect an outdoor sauna. All-in-one kits, like barrel saunas, have become popular choices, or you could build from scratch using plans. Another alternative is to breathe new life into an old shed or pool house through a sauna conversion.
You may wish to install a sauna as part of your indoor gym, a standalone in a large bathroom to replace an unused bathtub, a converted closet, part of an attic, or even a small washroom. Another possibility is to replace your existing shower stall with a steam shower.
If you’re dealing with a more restrictive budget, and revamping a closet or bathroom is not in the cards just yet, a simple long-wave infrared lamp can do in a pinch.
Building in your yard
Even though a building permit may not be necessary for erecting a sauna — as long as it’s less than 10 m2 (108 square feet) — you should make sure you’re respecting the zoning and setbacks for your property. Many municipalities restrict these types of accessory structures to the backyard. As with any structural addition to your property, check with your municipality for applicable requirements or restrictions.
If you need to run dedicated electrical and gas lines for your sauna, hire certified professionals to avoid dangerous and costly errors. Your REALTOR® can recommend someone to work with.
Building an indoor sauna
The primary consideration when installing an indoor sauna is moisture management. It’s critical that proper methods and materials are used to ensure adequate containment and ventilation of moisture. Only choose mould- and moisture-resistant materials for indoor sauna builds.
Failing to correctly seal and ventilate your sauna can cause dangerous mould incursions and possible structural damage. This is especially important in areas deeper inside your home where direct ventilation is not possible.
Whether you decide to build from scratch or create a bathroom sauna, legally the door must swing outwards. This ensures if someone becomes faint or injured, they can safely fall outside the sauna to avoid entrapment inside with the extreme heat. This also means adequate ventilation outside the sauna should be in place to remove escaping moisture.
It’s possible you’ll be dealing with electrical and, in some cases, gas feeds, which will require the use of certified professionals. If you’re using a gas-fed heating element, exhaust ventilation is key, and a carbon monoxide detector is also a requirement in the sauna.
About materials
If you plan to build from scratch, or inside, there are a few key details to note regarding materials. For builds from scratch using cedar planks, avoid overly knotty boards as they retain more heat, posing a burn risk. Be sure to use only certified sauna lights for this project.
When selecting insulation to seal your room against moisture, use a dense, moisture-resistant rockwool insulation like Roxul. Steer clear of spray foam or foam board insulation as they can leach toxic chemicals into the air when heated.
By now you should have a better understanding of saunas so you can hit the ground running for future rest and relaxation opportunities.
If you’re wondering how adding a sauna can affect the sale of your home, you can always contact a REALTOR® for their professional opinion.
— Realtor.ca