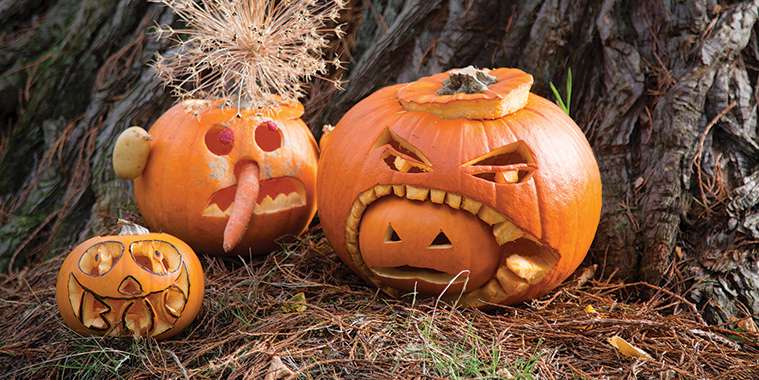
It’s spooky season! With Halloween upon us, now is the time to get out our knives and carve up a pumpkin or two. This is the simplest way to get your house ready for all the trick or treaters and indicate to them that you’re open for business.
Not sure how to get started? My first question is, “Where have you been?” All mockery aside, here are some great tips that everyone should know about to help you end up with the best— and possibly most terrifying — pumpkins on the block.
Picking your pumpkin
I always look for a range of pumpkin shapes and sizes. If you’re carving multiples, this is a great strategy for variety and interest. This strategy also allows for maximum imagination while avoiding having to choose. Or, you can just pick one really huge pumpkin for dramatic effect and set it in the center of your darkened front window. There’s something particularly spooky about a lone pumpkin flickering in the night.
To make sure that your pumpkin will last after carving, follow these tips:
• Look for a pumpkin that has a deep orange colour. Pumpkins do come in other colours, but just make sure they’re ripe.
• Knock on the pumpkin to check that it’s hollow, which means it’s ripe.
• Make sure the bottom of the pumpkin isn’t soft and mushy!
• Check that the stem is firm, dry and secure.
• Avoid bruised pumpkins and look for a smooth surface with no bruises or gouges. Bumps are okay, though — they add character.
• Make sure that your pumpkin will stand solidly upright and not roll onto it’s side.
Pumpkin carving supplies
There are some basic tools and supplies that will make your pumpkin carving experience fun and easy. Big knives are not the safest tool for this task if you’re carving with younger children. Pumpkin carving tools are easy to purchase and come with many fun patterns to choose from. To make the experience even safer, give each child a small gourd and a black marker and let them have fun while you carve.
• Newspaper: Cover the ground or table with newspaper to protect furniture and allow for easy cleanup of the carnage. If you’re going to roast the seeds after, separate the “guts” from the seeds as you work, or have your little helpers do it for you.
• Carving knife: You can purchase carving knives made specifically for pumpkin carving at your local craft supply store. These are generally good quality and last for years. The grocery store, discount store, and even the drug store (in pumpkin season) carry pumpkin carving kits with plastic-handled tools, but don’t be surprised if they break after one season. If you’re serious about your pumpkins, go for quality.
• Dry erase marker: Use a dry erase marker to trace your shape on the pumpkin if you’re making up your own faces. This way, even if you miss a bit cutting out the shape, you can wash it off with a damp cloth. If you’re using the patterns that come in the pumpkin carving kit from the store, you’ll follow the outlines of the shapes using the punch-tool.
• Ice cream scoop: If you didn’t purchase a tool kit, you can use an ice cream scoop to hollow out your pumpkin. You can also use a large metal spoon. Anything with a slim edge will help to separate the stringy bits from the interior walls.
Creating your Jack-o-Lantern
This is the fun part! Whether you’re creating your own faces or using a pattern, the result is always spooky and effective.
There’s a debate raging about whether you should cut a hole in the top or the bottom of your pumpkin. It’s certainly easier to light a candle and then set your pumpkin down on top of it, rather than reaching down into it. If you do cut the top open, you can use extra-long matches to light your candle through the mouth opening rather than risk a burn.
It’s a good idea to get the inside cleaned out as smoothly as possible, particularly if you’re using an elaborate pattern. If you’re carving a basic shape, sometimes those stringy bits inside add extra scariness. Just make sure they aren’t dangling into the flame of your candle. Or you can use LED candles for extra safety around all those flowing costumes.
Use a sawing motion when cutting through the skin. Some pumpkins are thicker than others and might require quite a bit of force.


