

You’re sitting outside, enjoying a cold drink on a hot day, and suddenly you feel the unmistakable itch of a mosquito bite. Like most Manitobans, we all know that the great outdoors and mosquitoes go hand in hand. But not everyone knows that the average bat can eat up to 1,200 mosquitoes per hour.
So if you want to attack your mosquitoe issue in a way that’s environmentally friendly, bats can be a great solution.
You might not know this, but bats are more closely related to humans than they are to rodents. And like humans, bats like a safe, suitable place in which to roost, especially in the spring when they are getting ready to have pups. As natural habitats disappear, finding adequate space to roost is becoming a challenge for Canada’s endangered bat species.
There are things we can all do to support declining bat populations by ensuring they can find and enjoy a safe haven, even in urban environments. Building a bat house is one of those ways.
There are six species of bats found in Manitoba, the most well known being the Little Brown Bat. Three species hibernate here over the winter, while the other three migrate to warmer climates during the colder months. Bats that overwinter usually do so in mines or natural caves. During the summer, some of these cave-dwelling bats use buildings to give birth and raise their young. They can also roost inside holes or under the bark of live or dead trees. Or in a bat house specifically built for that purpose.
If you want bats to eat your mosquitoes, and other bugs around your property, first you have to attract the bats. Building them a house is one way to do that. Although if you aren’t handy, pre-made bat houses can be purchased at most garden centres.
There are a few things to keep in mind if you want to be successful at attracting bats to your bat house.
First, you need to be within half a mile of a body of water or a river. Not only does this guarantee the bats a steady supply of fresh bugs to eat, but it will be more attractive to roosting bats since mama bats don’t want to fly too far from their babies, or pups, to get water.
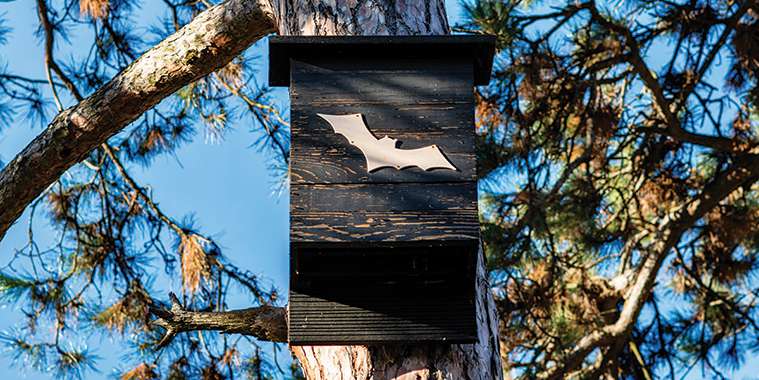
Second, look for the largest bat house you can safely hang. Bigger is better (at least 50 centimetres tall by 36 centimetres wide) since larger bat houses keep a more stable temperature and provide more space for a new mother to raise her pups. The number of bats that would gather in a single roost can vary widely, so it’s a good idea to buy a multi-chamber bat house, with passage holes between chambers, to make it more attractive to your house guests.
Third, you need to set up the bat house properly. This is essential to attract bats and keep them around. Make sure the house is 12-20 feet off the ground. Bats don’t like being close to the ground. Also, keep it away from trees if you can, which helps protect the bats from predators such as cats and owls. A tree is not the worst place to install it, but the side of a building or on a pole is best. The house also needs 5-8 hours of sunshine every day so facing south would be ideal. Mother bats require a warm area to nest their pups so the bat house needs to get some sunshine. But don’t put it near a nighttime light source.
Fun facts: Bats are mammals. Most significantly, bats are the only mammal that can fly. It is estimated that there are over 1,000 bat species in the world. A female bat only gives birth to a single pup each year, but there are instances of the birth of bat twins! The oldest bat on record was 41 years old.
Bat house
If you have the right conditions to install a bat house, and want to try building one of your own, here is an easy plan to help you get started:
Materials:
• One 4’x4’ sheet of 1⁄2” thick, untreated, outdoor grade plywood (could also be ¾” thick)
• One piece of ¾”x1½” board (which is what hardware stores call a 1”x2” board), 8’ long
• 30-40 exterior grade screws, 1¾” long
• Roughly one litre of dark (black or dark brown) exterior grade, water-based stain or paint
• One tube of paintable latex caulk, either for a caulking gun or squeezable tube
• Two hooks or brackets to install the bat house
Instructions:
1. Roughen one side of the back panel and both sides of the middle panel by using a sharp tool to create grooves. Or, using a circular saw, cut grooves at a depth 1/32” to 1/16”, each spaced ½” apart. This will provide texture that the bats will use to hang on.
2. Drill two ¾” wide holes towards the top of the middle panel (optional but ideal). This will provide passage holes for the bats to move between chambers.
3. Apply a bead of caulking to both sides of the wide edge of two of the pieces from step 6 and place on the left and right margins of the back panel (grooved side facing up).
4. Lay the middle panel on top of the two 1”x2” pieces from the previous step and attach with screws.
5. Apply a bead of caulking to both sides of the wide edge of the two remaining pieces from step 6 and place along the left and right margins of the middle panel.
6. Lay the upper front panel on top of the 1”x2” pieces from the previous step and attach with screws. Be sure to pre-drill the screw holes to avoid splitting the wood.
7. Leaving a ½” gap from the upper panel from the previous step, place the lower front panel on the 1”x2” pieces and attach with screws.
8. Stand the bat house upright and apply caulking to the top, and then attach the roof with screws.
9. Apply two to three coats of water-based stain to all exterior surfaces. Allow stain to dry between coats.
10. You’ll need to put two hooks or brackets on the bat house to install it. To ensure it is solid, attach the hooks or brackets on the back near each edge, screwing through the plywood into the 1”x2”.
Organizations like the Canadian Wildlife Federation (CWF) can provide you with more information. You can visit the CWF at www.cwf-fcf.org or helpthebats.ca