

When you get tired of looking at something, often the resigned decision is to get rid of it. Maybe a relative wants this old armoire; maybe you could hold a yard sale and maybe, if you lug that box of stuff down to the curb with a free sign on it, someone will take it off your hands.
The same does not need to be said for your chairs. If the foundation is strong, you can build from it. You might be tired of that old armchair gathering dust (or clothes) in the
corner, but maybe all it needs is to be reupholstered.
Starting simple is the easiest way to master upholstery. Recover cushions that have nice straight lines rather than curved arms or rounded backs until you get your feet under you, then move on to more advanced techniques.
Pick your patterns
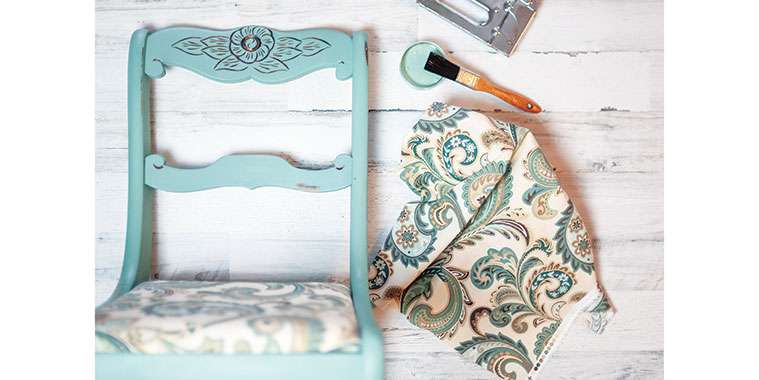
Now it’s time for the fun stuff. Head to your local fabric store after measuring the seats you want to cover (make sure to give yourself several extra inches) and browse through their upholstery fabrics. Durable fabrics like cotton, canvas, leather or faux-suede are great choices if your chairs are in high-traffic areas like the kitchen and living room as they’ll have a better chance of withstanding regular wear and tear for years to come.
Consider giving dining chairs an added layer of defence with a canvas liner before attaching your trendy fabric.
Remember, busy and bold patterns are fun but don’t discount the impact a strong, solid colour can have on a room. Pick a colour that compliments the room or find a contrasting shade. You can always add a pattern with a pillow.
Reduce, reuse, upcycle
Upcycling your favourite fabrics when reupholstering is a great opportunity to give them new life. Make sure your refreshed seat lasts by using sturdy options like denim or curtains (think blackout curtains). You can even sew together durable scrap fabric from other projects to make a unique patchwork pattern.
Gather your gear
Simple reupholstering doesn’t require an arsenal of supplies. Here’s what you’ll need:
• Sharp scissors
• Measuring tape
• Staple gun
• Fabric pen
• Foam or cotton batting if you want to give your old seat some new bounce
• Fabric for a lining
• Your fabulous fabric
• Measure twice, cut once
Be brave and get down to business:
1. Flip chair over.
2. Unscrew the seat from the base and legs.
3. Remove old fabric.
4. Replace the piece of foam and/or cotton batting.
5. Cover seat with thick liner fabric (like canvas) leaving plenty of overhang.
6. Flip seat to its backside, trace at least 3” around your frame with the fabric pen and trim.
7. Staple fabric on the wooden back at the centre of each side, pulling the fabric taut.
8. Staple each corner after pulling the fabric snuggly to eliminate any creases or folds on the cushion.
9. Trim any excess fabric.
10. Repeat steps five to eight with your final fabric.
11. Reattach to your chair and pat yourself on the back. Great job!
A case for the cat and dog
If you have a chair that has been claimed by your pet — and rendered unusable by everyone not interested in being covered in fur — a less fibrous material like leather or vinyl, or even a slipcover, might be the way to go.
Slipcovers are easy to clean and easy to create. Some are more labour intensive, but if you can wrap a present, you’re well on your way to making this removable seat cover.
You don’t even need to tackle the dreaded zipper thanks to adhesive velcro strips!
Here’s how to do it:
1. Measure each side of your cushion seam to seam to ensure you buy enough fabric.
2. Lay your fabric down on a flat surface, finished or patterned side down.
3. Place your cushion in the centre.
4. Bring one side of the fabric across and cover the cushion, pulling taut.
5. Attach enough adhesive velcro along the edge to create a solid seal.
6. Fold the other side of the fabric over 1” for a smooth line, align and attach the corresponding velcro to this flap.
7. Fasten the fabric.
8. On each remaining side, fold the ends in to create 45-degree angled flaps.
9. Fold the final two sides, attach the velcro just like you would with tape on a gift and voilà!
Tackle new techniques or master these simple solutions for a refreshed chair or cushion whenever the inspiration strikes you.
— Realtor.ca