
With so many people stuck at home due to the coronavirus right now, paper mâché is having a moment. And why not? You can make practically anything out of this craft, it’s easy to do, and it recycles used paper so it’s great for the environment.
Paper mâché has been around for a long time. While the term papier-mâché is French, meaning “chewed paper,” the material’s history dates back to ancient China and was invented during the Han dynasty, about 206 BC to 220 AD. It wasn’t until the 18th and 19th centuries that it became popular in Europe, and later, with crafters and artists.
Paper mâché items are limited only by your imagination. People are making paper mâché doppelgängers for Zoom calls, coronavirus piñatas (for the sake of catharsis), candlesticks, vases, houseplants (like cacti), lampshades, pendants for necklaces, bracelets, gift eggs, bowls, and even furniture.
Best of all, you aren’t limited to paper! You can use string, yarn, doilies or fabric. Anything that is reasonably porous to absord the glue, but pliable — meaning the paper that you have in your printer is too stiff — can be used. And if you’re using paper, newspaper isn’t your only choice. Tissue paper comes in tons of colours and leaves a beautiful, feathery edge to a lampshade or bowl. Other options are wrapping paper, kite paper and rice paper.
Supplies for this project are easy to find at any hardware or craft store. You may already have everything you need at home! Any object can be used for a shaper, or mould. If you want to make a vase, find one that you like the shape of, and use that. The same goes for a bowl. You can use a balloon if you want to make something round, or a simple box if that’s the shape you’re after.
Quick tip: Patience is key! Don’t try to rush ahead and put too many layers on at once; it will take twice as long to dry in the end and will not dry as consistently, leaving your project vulnerable to the possibility of mildew growth.
Here’s a simple project to get you started:
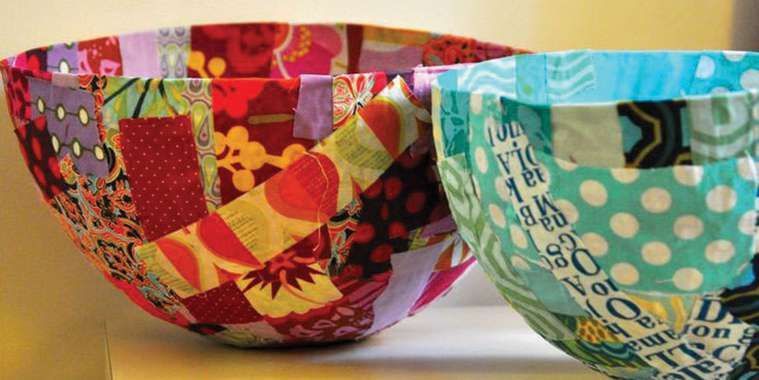
Paper Mâché Bowl
Supplies:
• Paper of your choice
• GlueAll, white wood glue, wallpaper paste, ModPodge or homemade flour-based glue
• Bowls, craft knife or scissors, spatula
• Plastic wrap and tape, or Vaseline
• Drop cloth or other plastic cover, and an apron to protect your clothes as the glue will not wash out
How to:
1. Buy a suitable paste or make your own:
• Add ½ cup of flour and 1 cup of water;
• Mix until smooth and lump-free. Create a thin paste that’s about the consistency of double cream. Non-toxic and super easy!
2. Tear up thin strips of paper. Follow the grain of the paper so that you get nice, even strips. The thinner you can make the strips, the better. It’s recommended that you aim for strips that are about 1” wide. Don’t use scissors to cut strips since the edges are harder to blend when you’re overlapping for a smooth finish.
3. Select a suitable bowl to act as a mould. Cover the mould in a thick layer of Vaseline. This is important because it helps to get your project off the mould when dry. Or you can cover the mould with plastic wrap, making sure it’s covered completely and securing with tape, if necessary. If using wallpaper paste, it won’t stick to the plastic wrap.
4. Dip a strip of paper into the paste. Wipe off the excess — while it should be covered in paste, it shouldn’t be dripping. Place the strip onto the mould and smooth it out. Repeat with each strip until the bowl is entirely covered with a single layer.
5. Leave the first layer to dry for an hour or two. Apply a second layer opposite the first layer. Leave the double layered project overnight to dry. This will allow the base of the bowl to harden thoroughly.
Put on another few layers the following day. This may take a few days for drying but is an important step to ensure that the bowl retains its shape and is strong enough for its intended purpose.
6. Remove your project from the mould once it’s fully dried. Slip a spatula between the paper and the mould. Gently separate the two items and lever the mould out. Trim the rim of the bowl to get rid of any jagged edges, or leave it alone for a feathery look.
7. Your paper bowl is now ready for any type of decoration. If you used newsprint, you can apply a coat of emulsion and paint it. If you used a fancy paper, you can leave it as is. You can also varnish the new masterpiece. This will protect the bowl from dust and spills. Remember, the bowl is not suitable for food — it’s only a decorative object.
Now that you’ve mastered this easy project, you’re probably hooked and ready to tackle something bigger. But don’t try to make a chair just yet!
If you do end up making a bowl, we’d like to feature it in our paper and make it famous! Email cpayne@winnipegrealtors.ca to submit your photo.