

By David Square
T. S. Eliot said, “April is the cruellest month.” I disagree. In my opinion, March is the cruellest month as it taunts us with the promise of spring, then clobbers us with a nasty blizzard or two.
To keep your spirits from being crushed by capricious March, you can spread light over darkness by creating Scandinavian ice candles, lamps or luminaries. Nothing says defiance like the glory of light at the end of a long winter tunnel, likely inhabited by a back-stabbing ground hog. (Punxsutawney Pete promised a warm end to winter this year.)
Scandinavian candles were invented by the Finns but soon after appeared in all areas of Northern Europe. The lanterns were primarily used as hospitality lights to welcome friends to a warm, safe haven during bitter winter nights.
Lanterns are easy to make, requiring only a vessel to hold water until it freezes. The change of state from liquid to ice requires 24 hours in a freezer, depending on the size of your container (most hold about 2.5 litres) and the temperature of your freezer.
Arctic Ice Lantern sells star-shaped ice forms made of reusable polypropylene. As the forms are 8” wide by 8” deep, they take up a lot of space inside a freezer. This time of year, it is more practical to let them freeze overnight outdoors.
Almost any container can be used to create a lantern. One of the least expensive is a balloon. The
orbital lanterns created by these flexible forms remind one of crystal spheres carried by wizards to illuminate dark and evil paths for their companions.
Materials required:
1. One or more ice lantern forms from Arctic Ice Lantern (www.arcticicelantern.com)
2. Bag of good quality balloons
3. Any other forms that will not crack when water freezes and expands such as ice cream pails and yogurt containers
4. Votive candles
5. Water
Fill the Arctic Lantern form to 1” from the top edge with tap water or distilled water for clearer ice. Place it in a freezer until the water is completely frozen or let it sit outdoors in minus 15C or colder weather.
To remove the form, leave it at room temperature for about 30 minutes, then flip it over and pour hot water into the centre hole. After five minutes, the mold should slip off the frozen water.
Place a votive candle in the mold’s centre cavity to illuminate the lantern. Remove metal bases from candles as they will melt through the ice.
For indoor use, place the lantern into a bowl to collect melt water. It will last about five hours at room temperature and all winter outdoors, as long as the temperature remains below zero and the candles are only lit in the evening (tea lights last only 3-4 hours).
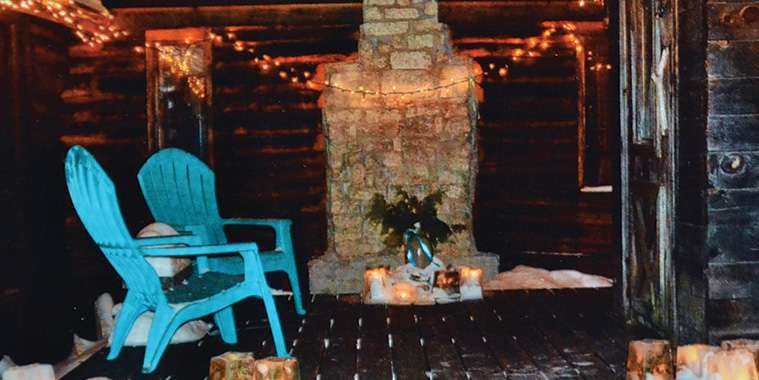
Placed in the middle of a table, luminaries create cheery, warm and beautiful centrepieces for special occasions. (They may require a river stone base to keep them level in the bowls. Outside, snow packed under the bases will do the same job.) To further enhance the lanterns, place berries, leaves, small pine boughs and flowers into the water. Design ideas are limitless.
To create a round lantern, fill a balloon with water by sliding the air hole over a tap. Support the underside with one hand as the balloon fills. Leave enough air space to allow the ends to be tied off and sufficient air to create a hole in the frozen globe to insert a votive candle.
Balloons are surprisingly strong when filled with water and will hold their spherical shape without external supports. However, to prevent filled forms from rolling off, for example, a kitchen counter, place them inside one litre margarine or similar containers with the knot up.
Put the balloon and container on an outside deck or in a freezer. They require vigilance while they freeze as only a thin layer of ice is required to create a hollow sphere; check them every two hours to ensure you do not end up with a solid ice ball.
The luminary is ready when you can pick up the balloon without breaking the ice; there should be liquid water visible inside the globe.
To remove the balloon, use a sharp knife to cut off the knot and then slide the latex downward over the ice globe. If you are working inside, perform this task over a sink or bucket as a large volume of H20 will rush out of the hole created by the knot. If the hole is too small for the diameter of your candle, increase the opening with a knife or a series of small holes made with a drill.
Some people lower a votive candle inside the globe through the hole at the top of the lantern. Others place the hole at the bottom of the form, making it easier to cover a lit candle as opposed to lowering one into the frozen ball. In this case, drill a ½” smoke vent into the top of each spherical
luminary.
So, there you have it: T. S. Eliot got his months muddled and Punxsutawney Phil is as reliable as a long-range weather forecast.
Line driveways, fill front yards, and decorate your deck to welcome visitors, and always have at least one on hand to glorify a social gathering with the light of angels.
davidsquare@yahoo.com