

by David Square
Building a hydraulic press to glue up small projects is worth the effort, especially if you are a DIYer who plans to produce several pieces of similar design.
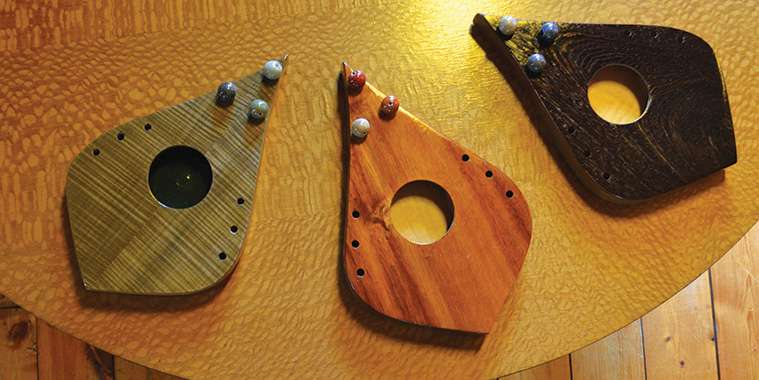
In all humility (not really), I was so pleased with the results of my door harp and the positive feedback I received about it that I decided to make a dozen more harps like the prototype. (See July 5, 2019 column.)
To speed up my “mass” production, I designed a simple hydraulic press to glue together all the pieces of the instrument in one go.
The press is also useful to construct jewelry boxes and other small items because it does not require multiple hand clamps for gluing, an operation that can be difficult for one person to manage.
Materials and tools:
3 pcs. 2” x 4” x 8’ #2 or better construction spruce
1 pc. 4” x 4” x 2’ spruce, cedar or treated lumber
1 pc. ¾” x 4’ x 4’ double-sided white melamine
4 pcs. 5/16” x 4” hex head bolts, nuts and washers
24 pcs. #10 x 1¼” flat head Robertson screws
2 pcs. one-ton hydraulic bottle jacks (about $17 each at big box builder stores)
Builder’s saw, screw gun, chisels, drill bits, wrenches, yellow glue
Cut eight pieces of 2”x4” about 22” long. Create half-lap joints at the end of each piece so they can be joined together to form two rectangles. Before securing the joints, make two half-laps in the bottom chord of each rectangle about 3½” O.C. from each upright side to receive two horizontal supports. At the same time, cut a half-lap O.C. in the rectangles’ top chords to fit a 4”x4” horizontal beam.
Assemble the rectangles with yellow glue and three #10x1¼” screws per each half-lap joint. The rectangles are the vertical frames of the press.
While the glue sets, cut two 2”x4” pieces about 20” long for the bottom horizontal chords. Each chord must be turned on edge for strength before you cut half-lap joints to match those already created in the bottom 2”x4” chords of the rectangles. Locate the half-laps 16” O.C. apart so your press has at least 14” of width to allow access to the jacks. Screw the horizontal pieces into position.
Cut a length of 4”x4” approximately 20” long with two half-laps placed 16” O.C. The pre-cut O.C. joints in the top chords of the rectangles will receive this beam. Use two 5/16” bolts and washers per joint to firmly secure this member into place as it will be
required to withstand the upward pressure of the
hydraulic jacks when the press is used.
Rip a piece of melamine about 14”x14” or of sufficient length and width to form a base to cover the horizontal and vertical bottom chords. Cut two more pieces of melamine (cauls) slightly larger than the item to be glued in the press. Place one caul under and the other above the item to evenly distribute the pressure of the jacks, ensuring a glued join with no skips. If you do not use melamine for the cauls, place sheets of wax paper between your project and the cauls to prevent seeping glue from welding everything together.
Place the jacks on the top caul. Increase the pressure evenly by working both jacks slowly until a thin line of glue oozes out of all the joins.
When using my press to create harps, I was able to glue a sandwich of two veneers, two pieces of Baltic birch and the instrument’s sides together in one shot, a time saver compared to the lengthy and, at times, frustrating process of joining individual pieces with hand clamps. Also, I was able to use yellow glue, not malodorous contact cement, to adhere veneers to substrates.
Finally, my hydraulic press has proved an excellent tool for gluing highly figured burl and crotch veneers to a substrate, a nearly impossible task using hide glue or contact cement.
davidsquare@yahoo.com