

By David Square
Soldering or “sweating” ½-inch or ¾-inch copper water-pipe is easy when you follow the correct sequence of steps to join pipe and fittings.
Tools required:
• Propane torch, self-igniting or striker-lit
• Non-lead solder
• Flux paste
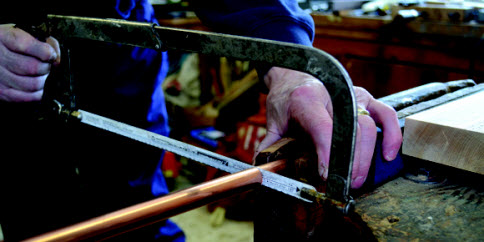
• Tube/pipe cutter or hacksaw and file
• ½-inch or 3/4-inch interior and exterior wire brushes
• #220 sandpaper in place of wire brushes
• Welders or fireplace gloves
• Flame protector cloth
• Goggles, hat
Materials:
½-inch or ¾-inch Type M copper pipe (also referred to as tube) is generally sold either by the foot or in 12-foot lengths. Type L pipe has a thicker wall and is used for underground or commercial installations.
Fittings: ½-inch or ¾-inch elbows, tees, couplings, etc. as required.
1) Lay out your pipe runs and fittings on a sheet of paper. If you are going through wood studs, a ¾ to 1-inch auger is handy. Metal studs are pre-punched for water pipe; however, a plastic insert of appropriate size must be used to protect the tube from sharp edges.
2) With the layout complete, cut your pipes to length with a tube/pipe cutter or a hacksaw. (Leave ½-inch extra of pipe for each end of a fitting) A cutter leaves a square, clean edge while a hacksaw kerf may be off-square and will have burrs.
3) Use a file to square the end of a pipe that has been cut with a hacksaw, then file off the outside burrs.
4) When all pipe ends are square and free of burrs, sand about 1-inch of the outside of each end with #220 paper or a wire brush to remove dirt. Tiny burrs on the pipe’s inside edge can be ground off with a dowel wrapped with sandpaper, a wire brush designed for this purpose or a half-round file.
5) Prepare fittings by cleaning each socket with a wire brush made for this purpose. Sandpaper wrapped around your little finger or a dowel will also work but is tedious.
6) Coat the outside end of each pipe and the inside socket of each fitting with paste flux, which etches the surfaces and allows the solder to flow freely.
7) Dry fit your pipes and fittings together, being sure that the pipes are seated at the bottom of every fitting.
8) Don your safety goggles and fire-resistant gloves; a hat will protect your head from dripping solder if working in a crawlspace.
9) If you are close to a flammable material like wood, protect the material with a flame cloth.
10) Open the gas valve very slightly and light your propane torch by pushing a self-ignitor button or using a striker or match. Once the torch is lit, open the valve until you have a long, blue, cone-shaped flame.
11) Move the tip of the blue cone slowly over the mid-point of a fitting. It does not take long for the fitting and pipe to reach the melting point of solder. Touch the end of a length of solder to the point where the fitting and pipe join. Ideally, the solder should run around the circumference of the join. If not, apply a little more heat and rotate the solder around the outside of the pipe.
12) If there is water in your pipe, a plumber’s trick is to push a piece of bread inside the pipe to sponge-up excess moisture. When the water is turned on, the soggy bread is expelled.
13) Test for leaks. A dripping join can be re-sweated as long as the water is off. Open a faucet to allow excess water to drain out of the pipes. .