

Building a footwear organizer for the entrance to your home is easy to do and will prevent you, your family and your guests from tripping over an unsightly pile of winter boots and shoes.
I made my cubbyhole organizer from western red cedar fence boards. The boards are available for about $5 each, taxes included, from most lumber retailers.
My cubbyhole will hold 10 pair of shoes, but the dimensions can be adjusted to accommodate winter boots which tend to be wider and taller than shoes.
To construct the handy organizer you will require:
1. At least five lengths of one-by-six-inch by six-foot red cedar, knotty pine or a wood of your choice.
2. Builder’s saw or crosscut handsaw.
3. Half-inch router with a three-quarter-inch carbide straight bit, biscuit joiner with No. 0 biscuits.
4. Palm sander with No. 120 garnet paper or sanding block.
5. Wood clamps, yellow carpenter’s glue, No. 6 by 1 1/2-inch brass or brass plated flathead Robinson screws, quarter-inch plug cutter, countersink.
6. One litre polyurethane or Tung oil, if you decide to finish the piece. Varathane makes an excellent gel stain called Ipswich Pine that imparts a warm cedar-like tone to pine and other light coloured woods, highlighting the figures and knots.
To begin, select the two straightest boards from your stock of wood and set them aside. They will be used as the sides of the cubbyhole organizer. The actual width of each piece will be about 5 1/2 inches.
Remove the factory-rounded edges from each of the remaining boards with a router equipped with a fence and a straight bit. A builder’s saw with a fence will do the same job. After the edges are removed, the boards should all be five-inches wide.
Crosscut the boards into 20 pieces, 10-inches long.
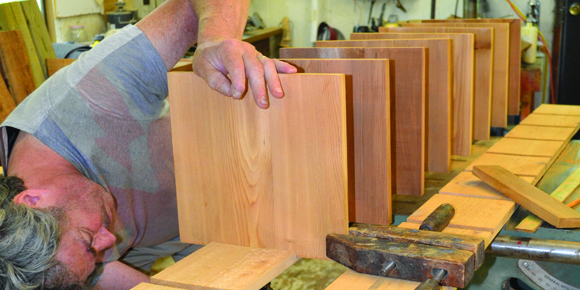
Join two boards together with clamps to form a 10-by-10-inch square shelf. Ten are required. A biscuit joiner and two No. 0 biscuits will make it easier to align the two pieces of wood during gluing as well as strengthen the joint.
Apply sufficient glue so that small droplets of the adhesive squeeze out from the joint line during clamping. It’s better to have a little extra glue than to risk a starved joint with insufficient glue. Clean up the excess glue with a damp cloth before it sets. This step will save a lot of arduous sanding later.
Allow the adhesive to dry for 24-hours at room temperature before sanding the shelves.
Meanwhile, you can cut dado joints in the two side pieces to receive the ends of the shelves.
I spaced my dadoes seven-inches OC, beginning at the top of the cubbyhole organizer and working downward to the bottom. This left an 11-inch space at the bottom into which my wife’s rubber boots fitted perfectly.
Dadoes can be cut with a router and three-quarter-inch straight bit (the thickness of the shelves) or with a builder’s saw and a set of dado blades. If you don’t own a dado set, you will need to make successive cuts with an eighth-inch wide crosscut blade to plough out a three-quarter-inch wide dado. Alternatively, a hand tool aficionado can accomplish this task with a backsaw and a chisel. Don’t cut the joints deeper than 3/8-inch (half the thickness of the sides) or you will weaken the structure.
When the dadoes are completed, assemble the unit by placing a shelf in the top dado on one side, aligning the shelf so there is 2 1/4 inches of wood protruding from the back and front of the side. Lightly mark the shelf’s position, then remove it and run a bead of glue along the bottom of the dado. Fasten the shelf with three 1 1/2-inch screws driven from the opposite side of the shelf. (Because driving the screws into end grain offers little holding power, I drilled holes in the end grain and glued birch plugs into the area where the screws pierce the shelf.)
Space two screws about three-quarter inches from the outside edges of each side and place another in the centre of each side. The heads can be countersunk and plugged or countersunk just enough so the heads are flush with the faces of the sides.
If you decide to use gel stain, wipe it on with a cloth and leave it on the wood for a couple of minutes. Remove the excess. If the colour is too dark, a cloth dipped in paint thinner will lighten the colour. If you prefer a deeper colour, wipe on more stain until you are satisfied with the look.
Pros for this stain are that it doesn’t run on vertical surfaces and it penetrates wood much more aggressively than liquid stains, resulting in a deep, rich colour that enhances the beauty of any wood.
Final word: For tall, wide winter boots, you will need to increase the height between shelves from seven inches to as much as 17-inches OC; you may also need to increase the width of the shelves from 10 inches to 14 inches or more.