

I attended jewelry school many years ago while I was building one-of-a-kind furniture. My plan was to cast sterling silver hardware to decorate a walnut desk and chair set my wife and I had created.
Most of the students in the school were women who were making delicate rings, bracelets and earrings. I became known as “the man who made golf ball jewelry” after I cast my first piece, a three-ounce ball of solid sterling silver that was to become one of four elaborate feet for the desk.
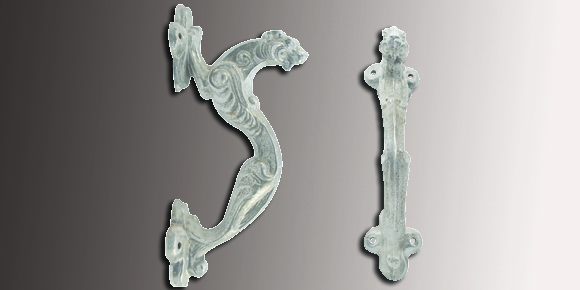
It wasn’t until I succeeded in making an aesthetically pleasing drawer handle that my fellow school mates showed me a little respect, but I was never accepted into the ring of cool people who made gossamer-winged dragonfly earrings out of 18-karat gold. As if I cared.
I’m telling this anecdote because solid brass cabinet hardware is expensive (over $12 per handle, in some cases), and the designs available are mostly traditional. For DIY woodworkers, who want to embellish their work with modern hardware of clean “less is more” design, the alternative is to hand cast your own original pieces.
Polished brass or brass with a patina is attractive, but gleaming silver is sublime, so I decided to use sterling for my hardware. It is readily available in the form of traditional flat ware, antique tea and coffee services and old coins. It also can be bought from scrap dealers based on the daily spot price of silver plus a small commission. Sterling is slightly less expensive than pure silver because sterling contains 92.50-per-cent silver and 7.50-per-cent copper. Pure silver is 99.99-per-cent silver by weight, making it too soft for practical items.
The basic tools and materials required for DIY home casting are a crucible, heat resistant gauntlets, a pair of tongs, muffler pipe, oxy-propane or oxy-acetylene torch, small furnace, vacuum casting machine and a rubber moulding machine if you want to make copies of your work. With the exception of a torch, most of the items listed above can be homemade from firebrick, aluminum, a hydraulic bottle jack and a small vacuum pump.
Carving wax, moulding rubber, wax sprues as well as machinery can be purchased from Lacy West Jewelry Supplies Ltd. I could not find a lapidary dealer in Winnipeg that sells a full line of jewelry equipment and materials.
Making your custom hardware:
1. Draw the piece or pieces of hardware you are going to make full size on a sheet of paper, including precise dimensions.
2. Trace your drawing on to the face of a block of carving wax (Ferris blue wax worked for me) and cut out the rough shape with a coping, jig or band saw. Wax is softer than wood, but it has similar working properties so many kinds woodworking tools can be used to carve and shape it.
3. Remove excess wax with carving chisels, rasps and, as you progress, fine files and 120-grit sandpaper. A dremel with assorted bits is also an excellent wax carving tool. I finished sanded my drawer handle with 220-grit paper to remove tiny blemishes on the surface of the wax.
4. Next, attach a flexible rod of wax called a sprue to a sprue base by carefully melting the end of the sprue with a small propane torch. This “main sprue” is like the trunk of a tree to which more sprues will be added. Attach these extra sprues to the sides and top of the model to allow molten silver to flow into the cavity left by the lost wax. Weigh the model and sprues and multiply the weight by 11, the specific gravity of sterling silver, to determine the amount of silver you will require.
5. Set a metal cylinder or flask (piece of exhaust or other steel pipe) over the wax carving and sprues. Mix a batch of water-based casting plaster in a cup, being sure there is enough plaster to completely fill the flask. When the material hardens, use a knife to carve a funnel-shaped opening in the base that exposes the main sprue. (If you used a sprue base, skip this step.)
6. Place the flask inside your oven and adjust the temperature to the one recommended by the wax manufacturer. Leave the flask in the oven overnight to allow all the wax to melt and drain out of the plaster form.
7. Next morning, use a jeweler’s saw or hacksaw to cut up your silver into approximately quarter-by-quarter-inch cubes and then place them in a crucible with a pinch of borax to remove impurities. Use the blue tip of your torch to melt the silver. The melting time will depend on the size of your torch and the amount of metal. Do not overheat the silver as this can introduce air bubbles into the metal.
8. When the silver is liquid, a helper equipped with gauntlets and tongs should by ready to remove the flask from the oven, holding the end with the carved funnel upright. Pour the molten silver into the funnel and immediately place the bottom of the flask over the hole in your vacuum machine. The vacuum sucks the molten metal through the network of sprues, filling the cavity created by the melted wax with sterling silver. If all goes well, you have cast your first piece of hardware.
9. Let the flask cool in the air for about 10 minutes, then pick it up with tongs and plunge it into a metal container of cool water. The water will hiss and steam for several seconds. When the flask is sufficiently cool to touch with your hand, carefully dig out the softened plaster with a small spoon with a rounded edge. Your piece of hardware with sprues attached is now ready for the final finishing process.
10. Remove the sprues with a jeweler’s saw and then file off the bases. Some touch up filing may be required to remove imperfections in the cast. I used 220-wet/dry paper and water to begin the polishing process, followed by 400-wet/dry. I achieved the final gleaming finish by buffing the drawer handle on a felt wheel charged with jeweler’s rouge.
11. To create a mould to duplicate your hardware, purchase rubber mould material from a lapidary outlet and insert your silver cast between equal layers of rubber, which are laid in an aluminum frame with a removable aluminum top and bottom. A sterling sprue that looks like a golf tee is lightly soldered to the piece of hardware. The tee-shaped sprue extends to the outside of the rubber stack to form an inlet for melted wax. The rubber is vulcanized through a process of heat and pressure.
When it has cooled, the rubber mould is cut open down the middle with a scalpel or other sharp instrument. Keys can be cut in the mould to ensure the two sides match when it is used. Melted wax is injected into the mould from a heated pot. When the wax has set, the mould is separated and a wax replica of the silver hardware is ready to be cast into metal. Rubber moulds can be used many times before they need to be replaced.
12. A word of warning: Don’t tell your wife, daughter(s) or female friends that you know about jewelry. You’ll be deluged by requests to fix anything from rings and bracelets to brooches and tiaras.