

I love fall. While it’s always sad to say goodbye to summer, it’s always nice to see some variety in that unrelenting sea of green foliage.
This year, trees seemed especially varied in their autumn shades. Usually we see a lot of yellow in Manitoba, but I noticed that leaves this year carried the most beautiful ombre shades, from gold to deep ochre to yellow to flaming red. Apparently, cool air (especially at night) with a lot of daytime sunshine promotes the formation of more red and purple pigments in leaves, and we did have some unseasonably cool weather early in August.
If you’re like me — and most children (we won’t go there) — you like to gather interesting fallen leaves on your walks. By now, you probably have a whole box full of them. So pretty, but what to do with your collection?
By using a simple glycerin solution, you can effectively preserve the beautiful colours of your autumn leaves. At the same time, they’ll remain flexible enough that you can use them in all kinds of autumn crafts, from fancy wreaths to simple jewellery such as lapel pins. Glycerin is used in many commercial beauty products and is a great moisturizer for your skin. You can find pure glycerin at most discount, health food or drugstores.
Glycerin-preserved leaves
Things you’ll need:
• Styrofoam disposable plates or a flat pan
• Glycerin
• Rock or other slightly heavy object
• Paper towels
Step 1: Mix a solution of one part glycerin and two parts water. Make about one cup of the solution, just enough to be able to cover the leaves.
Step 2: Pour the mixture into a flat pan or a styrofoam disposable plate. Place the leaves into the solution and submerge.
Step 3: Position a weight on top of the leaves. If you are using a styrofoam plate, it’s a good idea to place a second styrofoam plate over the leaves, and then you can place a rock or something else with a little weight to it on top of the second plate.
Step 4: Keep the leaves in the solution for up to six days. Remove the leaves and dry them with a paper towel. They should be pliable and ready to use in any of your crafts.
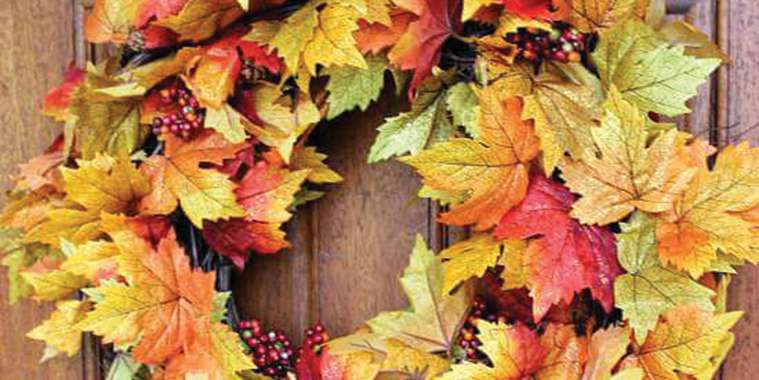
If you don’t collect leaves, you can still make a fall wearth using artificial leaves. Here’s a very simple craft store wreath that even the least crafty person can make in 10 minutes or less. (I needed more time, but that’s just me.)
Easy autumn wreath
Things you’ll need (these items can come from a craft store, or even the discount store):
• Leaf garlands
• Grape vine or foam wreath of any size
• Black craft wire (light and flexible gauge)
• Wire cutter (or heavy-duty scissors)
Step 1: You’ll be wrapping the front and sides of the grape vine wreath with your garland, so to be sure that you have a long enough garland for the size of wreath you’re using, make a test run. Fix one end of the garland with wire to a point inside the “donut hole” of the wreath.
Step 2: Starting laying the garland out in concentric circles, from the inside of the wreath to the outside. If it’s easier, you can use pins to tack it as you go. It’s okay to have some of the grape vine wreath showing on the edges, if you choose a less full look. There’s no right or wrong way to do this.
Step 3: Once you’ve determined you have enough garland for your project, you can start to wrap the wreath using the wire, under and over, around the entire wreath (think candy cane style), until the garland is securely fastened. You’ll probably have to pull the leaves out from under the wire as you go so they remain full looking.
Step 4: This is optional — you can add detail to your wreath with artificial berries or pine cones.
Step 5: Easiest step here. Hang it up and enjoy!
Long after the trees are bare, you can enjoy the beautiful fall colours by using these simple ideas.